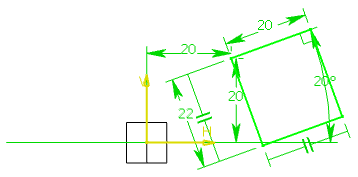
- From the Sketch section of the action bar, click Oriented Rectangle
 .
. Tools Palette now displays values for defining the
first side of the oriented rectangle (both points) and then either one
point on the second side or directly the oriented rectangle height.
-
In the H and V boxes of the
Tools Palette, specify the coordinates for the first
corner and press Enter.
-
Specify the values for the second corner.
-
In the W box, specify the required length.
-
In the A box, specify the required angle
value.
-
Press Enter.
- In the Height box of the Tools Palette, enter the height for the third corner and press Enter.
The oriented rectangle and its corresponding
constraints are created.

