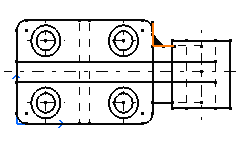
- From the action bar, click Weld
 . .This command is not available by default. To add it to the action bar, select , and drag and drop the command onto a section.
For more information, see Customizing Options. - Select a first element. For example, a line.
- Select a second element. For example, another line.
The default weld automatically appears on the drawing.
- Optional: In the Welding Editor dialog box, modify the weld. For example, modify the
thickness from ten to five millimeters.
- Optional: Modify the type of the weld by clicking the
Change Type.
- Click OK.
The weld is created. 
|