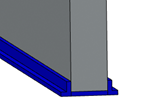
Creating a Standard Sill | |
| |
- From the Category list, select a sill category.
-
Under
Wall Edge Expander,
-
Under the
Wall column, select a wall.
The edges of the wall are highlighted in the 3D area and a new row is added to select another wall. In this way, you can create sills on several walls in one go.
- Under the Edges column, select the edges that are to be connected using the sill.
-
Under the
Wall column, select a wall.
- Optional:
In the
Start Offset and
End Offset boxes, specify the offset for sill
limits from the start and end extremities.
- Optional: Select the Consider cutouts check box to take into account the cutouts available on the selected wall edges.
-
Under the
Parameters area, specify the values for
various parameters of the sill as shown in the reference image.
- Select the Use sill height (H Value) check box to use the sill height parameter, and specify its value in the H box.
-
Specify the values for other parameters.
Use the
 ,
,
 , and
, and
 buttons to copy or to swap values between the left-hand
and right-hand boxes.
- From the Material list, select a material for the sill.
-
Click
OK.
The sill is created.
