-
From the Authoring section of the action bar, click Sketch Based
Sill
 . .
-
From the
Category list, select a sill category.
If no project dictionary is set in Data Setup, only the default category is available.
-
In the
Name box, enter a name for the sill object or
keep the system-generated name.
-
In the
Support box, select a wall or a curve.
If you select a wall, its edges are highlighted in the
3D area.
- Optional:
If you have selected a curve in the last step, select the support
(plane or surface) of the selected curve in the
Surface box.
-
In the
Edges of Wall box, select the edges that are
to be connected using a sill.
-
Click
 , and sketch and position the section of the sill with
respect to the wall. , and sketch and position the section of the sill with
respect to the wall.
The created sketch appears in the
Sketch box.
- Optional:
In the
Start Offset and
End Offset boxes, specify the offset for sill
limits from the start and end extremities.
You can also apply the offsets using the
handles on the sill curve in the
3D area.
- Optional: Select the Consider cutouts check box to take into account the cutouts available on the selected wall edges.
-
From the
Material list, select a material for the sill.
The material list is generated from the material table assigned
in Data Setup. If no material table is set in Data Setup, you can click More... to search and select the
material from database. A color mask is available in the material list. It
indicates the color computed by the Color ID business rule for the
current feature. -
Click
OK.
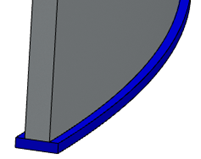
The sill is created.
-
To edit the sill, select the sill feature in the
3D area
or in the
tree,
and click
Edit Sketch Based Sill
on the
context toolbar.
Note:
The previously created sketch is displayed in the
Sketch box. You can click
to edit the sketch.
|