-
Click Create
new in the Choose a
3DShape dialog box.
The New Content tab appears.
-
Click 3D Shape under Physical Product
Structure node in the New Content
tab.
-
Click OK in the 3D Shape dialog box.
- The new 3D Shape is created under the active product.
-
The Line Definition dialog box appears.
-
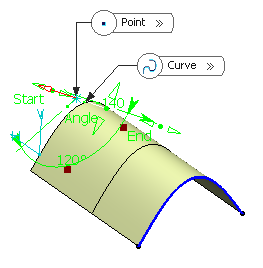
Select
 Angle/Normal to curve.
- In the Curve box, select a reference curve.
- In the Support box, select a surface containing that curve.
- In the Point box, select a point on the curve.
- In the Angle box, type the value or use the arrows to change the angle value.
-
In the Line End and Point Offset
boxes, select the start and end points of the new line.
The corresponding line is displayed.
- Click OK to create
the line.
|