-
From the Assembly
section of the action bar, click Point
 . .
The Choose a 3D Shape dialog box appears.
-
Click Create
new in the Choose a
3DShape dialog box.
In the Choose a 3D
Shape dialog box:
- The Product box displays the name of the active product.
-
3DShapes either lists the
available 3D shapes instanced under the active product or lists the available 3D shapes
instanced under a selected product. In both cases, these 3D shapes can be modified.
- The Create
new command allows you to create a 3D shape.
- The Automatically
create new 3D Shape when none exists option allows you to create a 3D
shape either under the active or selected product automatically. In this case, the
Choose a 3D Shape dialog box does not appear.
The New Content tab appears.
-
Click 3D Shape under Physical Product
Structure node in the New Content
tab.
-
Click OK in the 3D Shape dialog box.
The new 3D Shape is created under the active product.
-
Click OK in the 3D Shape dialog box.
- The new 3D Shape is created under the active product.
- The Axis System Definition
dialog box appears. The axis system's parameters Origin,
X axis, Y axis, and Z
axis are automatically computed, and Default
(Computed) appears in the boxes.
-
Select
 Circle / Sphere / Ellipse center.
-
In the Circle / Sphere /
EllipseElement box, select either a
circle, a circular arc, an ellipse, sphere or a portion of a sphere.
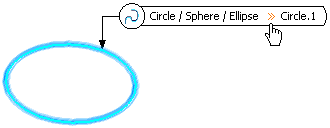
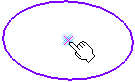
A point is displayed at the center of the selected element.
-
Click
OK to create the point.
The point (identified as Point.xxx) is added to the
tree.
|