Create a Light Source
You can create a light source from the action bar.
-
From the Ambience Studio section of the action bar,
click Manage Lights
 .
.
-
In the Light Sources panel, click Create
Light
 and then select the light type to be created.
The selected light is created in the 3D area and in a dedicated node in the tree.
and then select the light type to be created.
The selected light is created in the 3D area and in a dedicated node in the tree.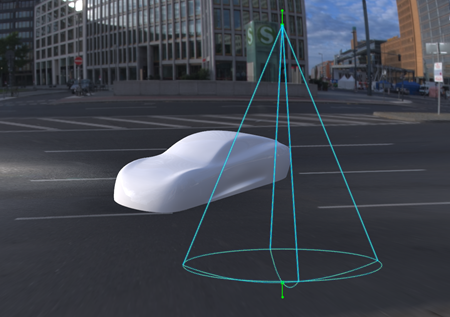
By default, lights are displayed in wireframe mode. To change the display mode, select Shaded in Me
 > Preferences > App Preferences > 3D Modeling > Styling
.
> Preferences > App Preferences > 3D Modeling > Styling
. Tips: - To change the light name, double-click the light symbol in the Light Sources panel, and then enter the new name in the editable box.
- To change the light type, click the light symbol in the Light Sources panel, and then select the new type in the list.
- To save space on your screen, click Minimize
 at the
upper right of the Light Sources panel. To restore the panel,
click the
at the
upper right of the Light Sources panel. To restore the panel,
click the  icon that is displayed on the left side of the work area.
 .
.