-
From the Steel Detailing section of the action bar, click Clip Angle
 . .
The building is hidden and the catalog members and steel detailing
features are shown as transparent.
-
Select a face of the host member, and then select a face of the second member
or plate.
The intersection of these faces defines a curve along which the clip angle is
positioned.
-
In the Clip Angle dialog box, select the shape of the
clip angle.
- To select the shape of the
clip angle cross-section from a subset of a steel catalog, perform the
following steps:
- Click
 . .
- From the
Catalog list, select the desired catalog.
- From the
Type list, select the cross-section shape
of the clip angle.
- From the
Size list, select the size of the clip
angle.
- In the
Width box, specify the length of the extruded
section of the clip angle.
- To create a clip angle from
a piece of bent plate, perform the following steps:
- Click
 . .
- In the Length
along face U box, specify the length of the plate in
the U direction.
- In the Length
along face V box, specify the length of the plate in
the V direction.
- In the Bend radius box, specify the radius
of the curve formed at the inner side of the bent plate.
- In the Thickness box, specify the thickness
of the clip angle.
- In the Round angle to multiple of box,
specify the smallest increment to which the included angle of the
clip angle should be rounded.
- In the Width box, specify the width of the
plate.
-
Align the clip angle.
| Option | Description |
|---|
Left
 |
Positions the clip angle with its left edge at the left end of a
line created by the intersection of the selected faces. |
Right
 |
Positions the clip angle with its right edge at the right end of a
line created by the intersection of the selected faces. |
Center
 |
Positions the clip angle centered on a line created by the
intersection of the selected faces. |
-
Click Clip Angle Options
 and
specify the offsets in the Offset from face U and
Offset ffrom face V boxes. and
specify the offsets in the Offset from face U and
Offset ffrom face V boxes.
Note:
You can click  to
reset the offset values to zero. to
reset the offset values to zero.
-
Click Ok
 . .
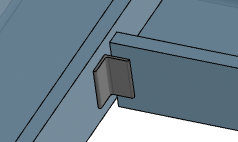
The clip angle is created. 
|
 .
The building is hidden and the catalog members and steel detailing features are shown as transparent.
 .
.  .
. 


 and
specify the offsets in the Offset from face U and
Offset ffrom face V boxes.
Note: You can click
 to
reset the offset values to zero.
 .
The clip angle is created.