Creating Stiffeners

You can attach stiffeners to the catalog members to strengthen them against out of plane deformations.

This task shows you how to:


Before you begin: Open a building containing catalog members.

Create a Stiffener Plate

You can add a stiffener plate normal to the neutral axis of a catalog member, a plate or a clip angle.

  1. From the Steel Detailing section of the action bar, click Stiffener Plate .
    The building is hidden, the catalog members are shown as transparent, and their neutral axes are displayed. Pick-able segments on the plates and on the clip angles are also displayed.
  2. Select a positioning point on the neutral axis of a catalog member or on the pick-able segment of a plate or clip angle.
  3. In the Stiffener Plate dialog box, select the shape of the stiffener plate.
    OptionDescription
    Rectangle Lets you create a rectangular stiffener plate.
    Triangle Lets you create a triangular stiffener plate.
    Profile Lets you create a stiffener plate from a closed sketch.
  4. To specify the dimensions of the plate, perform the following steps:
    1. Select Match flange width check box to make the width of the stiffener plate equal to that of the flange.

      Note: Clear this check box to specify a custom width for the stiffener plate.

    2. Select Match web depth check box to make the depth of the stiffener plate equal to that of the web.

      Note: Clear this check box to specify a custom depth for the stiffener plate.

    3. In the Chamfer length box, specify the chamfer length for the plate's corners that touch the web-flange intersection of the catalog member.
    4. In the Thickness box, specify the thickness of the stiffener plate.

    Tip: You can also use the dimension manipulators in the 3D area to modify the dimensions of the plate.

  5. To shift the stiffener plate to a different web-flange intersection point, click Snap to Next Joint .
  6. Select the thickness orientation of the plate.
    OptionDescription
    Front side Applies the thickness in the positive side of the UV plane.
    Back side Applies the thickness in the negative side of the UV plane.
    Both sides Applies the thickness centered on the UV plane.
  7. Click Stiffener Plate Options and specify the offsets for the plate in the U and V directions.

    Note: To reset the offset values to zero, click .

  8. Click Ok .
    The stiffener plate is created.
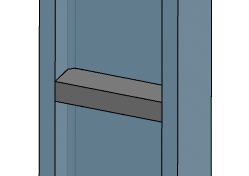
Create a Stiffener Plate Pattern

You can add a pattern of equally spaced stiffener plates normal to the neutral axis of a catalog member, a plate, or a clip angle.

  1. From the Steel Detailing section of the action bar, click Stiffener Plate Pattern .
    The building is hidden, the catalog members are shown as transparent, and their neutral axes are displayed. Pick-able segments on the plates and on the clip angles are also displayed.
  2. Repeat steps 2 to 6 from the above task.
  3. In the Count box, specify the number of stiffener plates you want to position.
    1. Select the Add plate at end 1 check box to add a stiffener plate at one end of the catalog member, plate, or clip angle.
    2. Select the Add plate at end 2 check box to add a stiffener plate at another end of the catalog member, plate, or clip angle.
  4. Click Stiffener Plate Pattern Options and specify the offsets for the plate in the U and V directions.

    Note: To reset the offset values to zero, click .

  5. Click Ok .
    The stiffener plate pattern is created.