-
From the Compass, click 3D Modeling
Apps
and select the app that has been created by the expert user (e.g. SkateBoard2 in this scenario).
- In the New Content dialog box, select Physical Product.
- To initialize the process, double-click the process name and click the object you want to type.
- If you work in a Product context, create a Knowledge Engineering Specification.
Note:
If no Knowledge Engineering Specification exists, a new one is created. The object is typed and the corresponding technological object appears along with the associated variables. At the end, the Supervision Window appears if a process exists.
Note:
If the selected object is already typed, the Supervision Window opens exactly as it was when closed for the last time.
-
Click
 to begin.
Note:
Before clicking
 , the rectangular boxes from the Supervision Window corresponding to the steps are dark-greyed. When you start, these boxes become light-gray and the first step you are working on (Initialize here) becomes yellow.
Your design process can be executed.

Note:
Right-click the name of the process and click Start to launch the process.
-
Double-click Initialize.
A dialog box in which you need to enter the type of skate (e.g.
Leisure) the skate characteristics (e.g.
Length: 800,
Width: 200 and
Maximum mass: 4kg) appears.
Click OK when finished. You see now that the box we have been working on is green. The following box is now yellow.
Note:
This particular dialog box has been designed by the expert user for the specific case of this skate and can be different in another context.
-
Double-click the box called Board.
The Catalog Browser appears. Select a board and click OK.
The board appears and you can click the next box.
-
Double-click the Axles box.
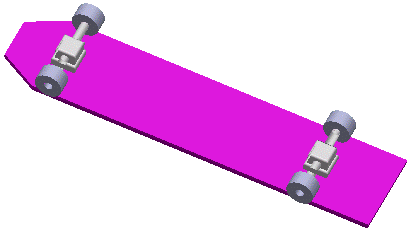
The axles of the skateboard are now taken into account and have been added to the 3D representation. This step is finished.
- Double-click the box that follows called Leisure Wheels.
These specific wheels appear on the 3D representation and this step is complete. All the elements have been gathered to form the whole skateboard.

Note:
You can see that in this scenario, the path of the Supervision Window of is divided into two. Here, the Leisure Wheel box comes directly after the Axles box because the type of skate that has been previously selected is Leisure.
- Double-click the last step of the design process called Compute Mass. It allows calculating the mass of the object (the skateboard here).
Once the mass has been calculated, a dialog box giving the mass appears. It shows the end user if the mass of his object is under or above the previously specified limit. Click OK to close this dialog box.
The design process came to an end. All boxes from the Supervision Window have to be greened out.
 to begin.
Note: Before clicking
 , the rectangular boxes from the Supervision Window corresponding to the steps are dark-greyed. When you start, these boxes become light-gray and the first step you are working on (Initialize here) becomes yellow. Your design process can be executed.
 Note: You can see that in this scenario, the path of the Supervision Window of is divided into two. Here, the Leisure Wheel box comes directly after the Axles box because the type of skate that has been previously selected is Leisure.