Creating a Circular Pattern | ||
| ||
-
From the Transform section of the action bar, click Circular Pattern
 .
.
Tip: In the top menu of the dialog box, you can switch between Linear Pattern  and Circular Pattern
 features.
 -
Select the objects to pattern:
While selecting items, you can select features, bodies, or faces from the work area.
- To pattern faces, click in Features to pattern
and select one or more items from the work area to pattern.
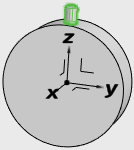
- To pattern bodies, click Body selection and click
in Bodies to pattern and select one or more items
from the work area to pattern.
Click Merge results to merge the pattern with the selected bodies.
- To pattern faces, click in Features to pattern
and select one or more items from the work area to pattern.
- In the Circular Pattern dialog box, in Axis of rotation, select an axis from the work area to create rotation about that axis.
- Optional:
Under Direction 1, specify the direction for the
pattern.
A preview appears in the work area.
- Instance angle
- To specify the angle between each instance, select Instance angle.
- Enter an angle value in Angle.
-
To reverse the direction, click
 .
.
-
To create multiple instances of the pattern, enter a value in
Number of instances.
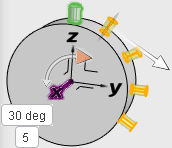
- Pattern angle
- To specify the overall patter angle, select Pattern angle.
- Enter an angle value in Angle.
-
To reverse the direction, click
 .
.
-
To create multiple instances of the pattern, enter a value in
Number of instances.
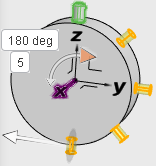
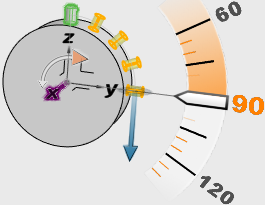
Alternatively, you can drag the handle to specify the angle value.
-
Under Direction 2, specify a second direction for the
pattern.
- Instance angle
- To specify the angle between each instance, select Instance angle.
- Enter an angle value in Angle.
-
To reverse the direction, click
 .
.
-
To create multiple instances of the pattern, enter a value in
Number of instances.
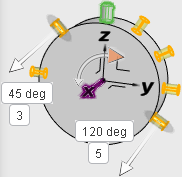
- Pattern angle
- To specify the overall patter angle, select Pattern angle.
- Enter an angle value in Angle.
-
To reverse the direction, click
 .
.
- To create multiple instances of the pattern, enter a value in Number of instances.
- Optional:
Under
Advanced, select one of the following:
Note: Geometry pattern and Feature pattern options are not available when Body selection is selected.
- Geometry pattern: Creates the pattern using only the geometry of the feature.
- Feature pattern: Creates the pattern using the feature definition of that geometry.
-
To skip creation of specific instance, select Skip
instances.
The white dots appear on each instance. You can click a dot to skip particular instances from the pattern.
- Click Quick preview to display the preview without Boolean operations for faster results.
- To align each instance to match the alignment of the selected geometry to pattern, click Align with seed.
-
Click
 .
.