Using Selection Propagation | |
| |
-
Select an element either in the tree or in the 3D area.
The selected element is highlighted in blue.

-
On the context toolbar, click Selection Propagation
 .
.
You can also access the command from the Direct Edit section of the action bar.
A dialog box appears. -
Select the Propagation selection type of your choice.
Option Description No Propagation Resets the selected propagation options. Whole Shape Extends the selection to the whole shape. Protrusion Extends the selection to its protrusion. Depression Extends the selection to its depression. Same Fillets Extends the selection to all fillets having the same radius as the selected one. Same Primitive Multiselects primitives identical to the selected one. Same Geometry Multiselects geometries identical to the selected one. Wall Extends the selection to parallel faces if any. Tangent Extends the selection to all tangent geometries. Contact Edges Extends the selection to all edges sharing the same end with the selected edge. Contact Faces Extends the selection to all faces sharing the selected edge. Same Edges Multiselects edges identical to the selected one. Same Draft Multiselects drafts identical to the selected one. Same Draft Angles Multiselects drafts whose angle is identical to the selected one. Same Chamfers Multiselects chamfers identical to the selected one. A preview of the extended selection is displayed in yellow. In the example below, the Whole Shape option has been selected. Note: You can chain several propagation options. The output of the current propagation option becomes the input of the next one.
 -
Click
 to validate the selection.
The whole shape is selected.
to validate the selection.
The whole shape is selected.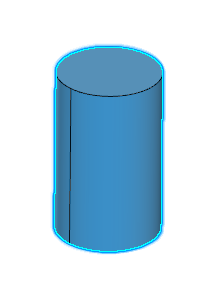
Depending on the selected Propagation selection type, the context toolbar appears and displays the available commands for editing the selected elements.