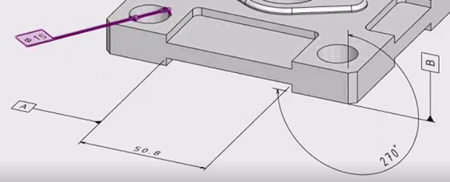
Attaching Datum to Dimension

You can attach a datum to a dimension to create clear and compliant documents that properly define a product.

To attach a datum, you select Datum from the action bar. You can also select a dimension and then from the context toolbar, select a datum.


Before you begin: Open or import a model in the app.
See Also
Creating Dimensions
  1. From the action bar, select Annotation> Datum .
  2. Select a dimension to which you want to attach a datum.
    The datum gets attached to the dimension.
  3. Click anywhere in the work area to place the datum.
    The Datum dialog box appears, and you can make modifications in it.
  4. Click .


    Only one datum can be attached to a dimension. You can select the datum to modify it. The datum box and text align with the orientation of the associated dimension.

    If you delete the dimension, the datum attached to the dimension also gets deleted.

    If you move the dimension's annotation plane, the datum also moves accordingly.

    Note: You cannot attach a datum to a dimension if:
    • Another datum is already attached to the dimension.
    • The dimension is drawn between two vertices.
    • A geometric tolerance is attached to the dimension and a datum is attached to the geometric tolerance.