-
From the
Subdivision section of the
action bar,
click
Ring
 . .
A ring is displayed in the
work area.
-
Select a plane or planar face for the subdivision.
Note:
Repeatedly press
Tab to cycle through the orientation of the
subdivision on the various planes.
-
Click in the
work area
to place the ring in the approximate location you want.
-
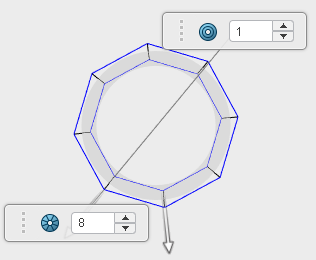
Click in the text boxes and enter the number of subdivision in the
mesh.
-
Drag the arrows to define the inside and outside diameters.
-
In the FreeForm dialog box, drag the
Scale slider to scale the size of the subdivision
body and click
 . .
- Optional:
Drag the
Robot arrows to position the ring.
-
Optional: Drag the mesh points and faces to customize
the shape of the ring.
To assist with selecting the mesh entities, the following options are available:
- For faces, press i or o to
select a face loop around the subdivision. Click near an edge of the
face to select the direction of the loop.
- For edges, press i to select edge rings around
the subdivision, or press o to select edge loop
around the subdivision.
-
Click
 . .

|