Mapping Concept Surfaces | ||||||
|
| |||||
-
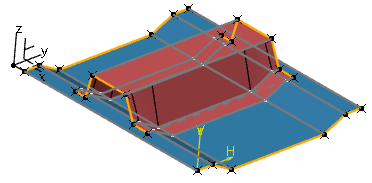
From a concept surface to be mapped, select a face output.

-
From the Concept section of the action bar, or from the context toolbar, click Map
 .
In the Manage Mappings panel, the face output is added to the map sources list. The Containing Object(s) line displays the parent concept surface.
.
In the Manage Mappings panel, the face output is added to the map sources list. The Containing Object(s) line displays the parent concept surface.In the File Source Tree list, Manual Selection is selected. The selected face output is added to the map sources list.
-
In the Map Targets section, click Modify Map Target
 .
.
-
Select one or multiple face outputs of the target concept surface and click
Select map targets
 .
.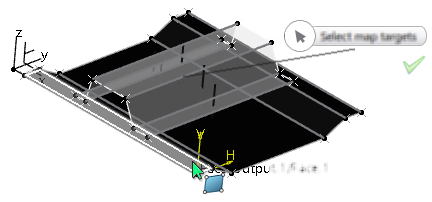
The concept surface is mapped onto the target concept surface. The map source list is cleared.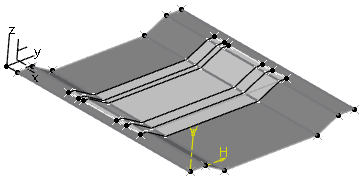
-
In the map source list, select Mapped Surfaces.
The list now displays all mapped face outputs with the
 icon.
icon.Clicking
 expands the tree and displays all associated objects
  .
.Hovering with the pointer over the list entries emphasizes the corresponding objects in the work area.
-
Select one or multiple face outputs and click Show Initial
Position
 .
In the work area, the unmapped position of the selected face outputs is displayed.
.
In the work area, the unmapped position of the selected face outputs is displayed.
-
Click Unmap
 and
Select map targets
.
The selected face ouputs are unmapped and removed from the map source list.
and
Select map targets
.
The selected face ouputs are unmapped and removed from the map source list.
-
Click OK to create the mapping.