Creating the Reinforcement and the Holder | ||
| ||
- Select one or several active geometries and select Create Reinforcement
 in the context toolbar to create a reinforcement.A reinforcement is created on all selected active geometries.
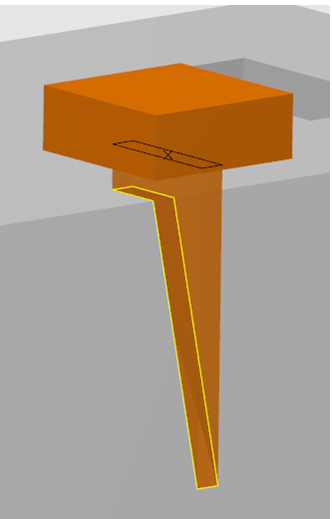
- Drag a face of a reinforcement to resize the reinforcement.
Tip: Double-click the handle to enter a value. 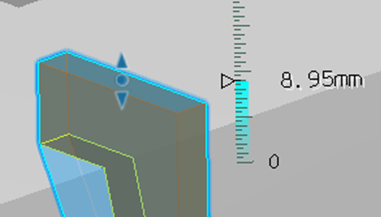
- In the context toolbar of a reinforcement, select
- Square Reinforcement
 to give the reinforcement a rectangular base.
 - Circular Reinforcement
 to give the reinforcement a circular base.
 - Draft
 to apply a draft angle to the reinforcement. Drag the handle that appears to define the draft angle.
 - Holder From Content Chooser
 to insert a holder selected from the 3DEXPERIENCE platform.
 - Holder From Catalog
 to insert a holder selected from a catalog.The holder is placed automatically on the reinforcement.
- Delete Holder
 to delete the selected holder.
 - Delete Reinforcement
 to delete the selected reinforcement.
 - Mirror Extend
 to apply a mirror extension to the reinforcement.
- Square Reinforcement
One product is created for each electrode. It contains:
- One 3D Part for the active geometry, with:
- A representation containing an external reference to the shape that contains the cavity.
- One body per active geometry (top and bottom plane and pad).
- One body for the reinforcement (extremum planes).
- One product for the inserted holder.
Required skeletons, publications, and engineering connections are also created for a future use in Core & Cavity Separation.