Defining or Editing the Type and Object Types of Bridge Elements | ||||
|
| |||
- You can try to retrieve the default object types or most recently used object types by clicking Retrieve most recently used object types. If they are defined, global types and object types for all bridge elements will be automatically retrieved.
-
To define the deck globally, select a Type.
You can see the type name for this item in the Global Object Types table.
-
To define the deck object type, click Define by Type
 to search for a user-defined object type and associate it to the deck.
The Object Type Browser dialog box opens. For more information, see Defining Specification Features.
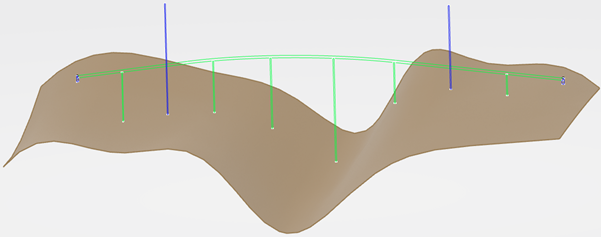
Tip: For example, you can select a Pier Type for all the supports, except for two, which are defined by the Tower Type. You obtain: 
-
Repeat the same steps for the Start/Middle/End supports.
When the assigned object type is displayed in the 3D area, it means that the feature has been defined locally. The object types that have been defined globally are only displayed in the Bridge Design Assistant.
-
Check the input status by looking at the second column in the Global Object
Types table.
Object Type Status Description 
The object type is not selected for the function. Click the red icon to search for the object type. 
After the object type selection for a function, the corresponding specification set is not immediately created. Modify some elements locally and click the blue icon to instantiate the specification feature sets. 
Once instantiated, the missing inputs' statuses can be updated manually or automatically depending on the input. Click the orange icon to start the Capture Component Specifications command. 
Some inputs are still missing and an information message is displayed. Click the orange icon to start the Capture Component Specifications command. 
Once instantiated, the missing inputs' statuses are updated. - You can select options when a local bridge element is selected.