Navigating a Virtual Environment Using HMD | |
| |
- Open a scene.
-
To improve performance, run the following two commands:
- View
Modes...
 and
make sure the No edges option is activated, and the
Axes and Points options
are cleared.
 - Visual Quality...
 and
tune the appropriate options for pixel culling, occlusion, antialiasing, and
shadows.
- View
Modes...
- Plug the HMD device and put on the headset.
-
From the AR-VR section of the action bar, click HMD
Configuration
 .
This command lets you configure your scenario only once. You can then activate or deactivate it when required through the HMD command.
.
This command lets you configure your scenario only once. You can then activate or deactivate it when required through the HMD command.The viewpoint when using the HMD corresponds to the current viewpoint in your session.
-
In the Available HMDs area, choose a library from the Device
Library list.
Option Description OpenVR Relevant for OpenVR drivers supported through SteamVR. This is the default.
OpenXR Relevant for OpenXR drivers. It is an open standard for integrating VR (Virtual Reality) and AR (Augmented Reality) devices. The Available HMDs area also displays the list of detected and supported devices. The list is regularly updated and may vary depending on the chosen library.
-
In the Select VR environment list, select an environment
for your scene.
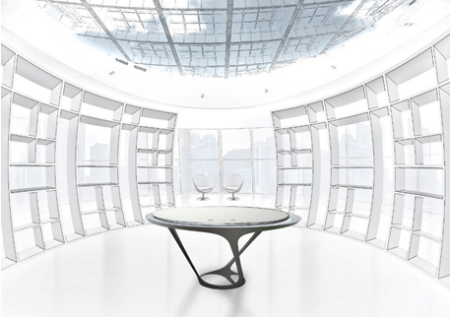
Option Description None Displays a designer environment. You stand on the floor and your head is at the camera position. Automatic Displays a natural environment. The start position is predefined: the model orientation corresponds to the current viewpoint before running the HMD command. 
This environment is relevant for small models (that is with a size < 30 centimeters), medium models (between 30 centimeters and 1 meter), or large-size models (< 5 meters).
Small and medium models are located on a table, larger ones are on the floor.
When teleportation is activated, point the turntable or an object with the trigger, and then perform the appropriate action.
Action Description Slightly press the trigger. Moves the pointer but not the pointed element. Push the trigger forward. Moves the pointer and the pointed element. Click the turntable. Moves the object to the turntable. - In the Model scale box, define the scale at which the scene is displayed.
-
In the VR Skillsets area, leave Product Explore option
selected to use exploration commands.
Important: - This option can be used only with a HTC© VIVE™ headset.
- This option is relevant for the designer environment, which means that the Select VR environment is grayed and automatically set to None. The VR Avatar section is also grayed.
You can use the following exploration commands.
Option Description Action for Controller Hide Hides or shows elements. Aim at the object to hide, then pull the trigger. Section Sections through the model using a transparent cutting plane. You can move the section and choose between different options to define the style, transparency or position of the section, or which part of the model is visible.
Pull the trigger, slice to position the initial section plane, then release the trigger. Explode Explodes the model. You can also make an audio recording and display it in the scene for future use.
Pull the trigger while spreading hands to expand, or bringing hands together to collapse. Note: Both controllers are required for this command.Measure Measures objects or the distance between two objects. When pointing a single object, its position, length, or area is computed.
When pointing two objects successively, the distance between them is computed.
You can use options to display additional information: coordinates of the extremities of a segment, center of gravity of an area.
Aim at the starting point and pull the trigger, then repeat this operation for the end point. -
In the VR Avatar area, define the appropriate options for the avatar.
Option Description Show Body Lets you display or not the avatar's body. Avatar's Height Lets you specify the avatar's height. Female/Male Lets you select the appropriate gender. -
In the Navigation area, select the navigation mode, use the Start
with list to select the navigation mode.
Option Description Examine Means that no navigation is allowed. You can only zoom, or look left or right. Fly Lets you move upward or downward on any horizontal view plane as you move forward or backward. Note: Depending on the device, this option may not be available.Walk Lets you walk forward and backward or turn right or left as you walk along the horizontal plane. Note: Depending on the device, this option may not be available.Teleport Lets you point where you want to be in your virtual environment and teleport yourself to that position. When in Teleport navigation mode, proceed in the following order:
- Touch the trackpad to display the teleport pointer.
- Point the floor or any horizontal object.
- Move your wrist to choose the orientation.
- When satisfied with the orientation, click the trackpad to teleport.
Tips: - You can switch between navigation modes directly from your device by pressing the appropriate button. For example, the side (grip) button of the controller for the VIVE™, or Start for the gamepad.
- For HMDs without controllers, a gamepad may be used to have access to Fly and Walk options.
- In Examine mode, you can reset the scale to 1:1 by pressing the HTC touchpad.
-
Use the Navigation speed option to define the speed at
which you want to navigate (in meters per second).
This option is available only if Fly or Walk is selected.
-
Select the Use ground option to position yourself at
ground level.
This option has no effect if you clicked Automatic in the Select VR environment list.
- Select Level to activate the box on the right that lets you indicate the ground height (in millimeters).
-
In the VR Viewpoint area, select the cameras to be used for navigation (you can
select multiple cameras).
These cameras must have been previously defined through Views...
 in the View section of the action bar. For more information, see Live Rendering: Cameras.
 To cycle through cameras, click the trackpad of the first controller: each click moves you to the next camera's position and orientation.
Important: This functionality is available for the Fly and Walk navigation modes only. -
In the Performance and Desktop area, select the appropriate options.
Option Description Hide HMD mirror window When running an HMD scenario (or a CAVE scenario with an HTC© device), makes the VR mirror on the computer without having to put the headset on. By default, the mirror mode is activated.
Stop rendering app viewer Temporarily suspends the scene update on the desktop. If this option is selected, more resources are allocated to the HMD.
Note: This option is relevant for scenes with animated objects.Render continuously Improves perceived performance on heavy computations, or when a model is very slow to render. For example, if you load a model while an immersive command for HMD is running, you can still see the scene in the HMD, even though the 3DEXPERIENCE platform process is frozen (because of the model loading).
Important: - Some navigation commands that need some main loop time
cannot be used (for example, interactions using the Vive™
controller).
The main loop gives user inputs to the app to start the rendering process.
- Only objects visible before main loop hold remain visible while the main loop stays busy (that is, objects initially outside the view are hidden).
- When the main loop is released, if it has been hold for a long time, objects that should be displayed according to the new view position suddenly pops in the view.
- When this option is activated, you cannot perform any interaction.
Display Generic Trackers Lets you hide or show trackers. Note: If prehighlight/highlight options are not selected, then objects that are prehighlighted/highlighted in the 3DEXPERIENCE window are also prehighlighted/highlighted inside the headset and in the mirror window. - Some navigation commands that need some main loop time
cannot be used (for example, interactions using the Vive™
controller).
-
From the AR-VR section of the action bar, click HMD
 to run the scenario.
Note: You cannot make any modification to the visualized object.
 - Swipe the touchpad to navigate in your scene.
-
From the top bar, select Share
 > 3DMessaging.
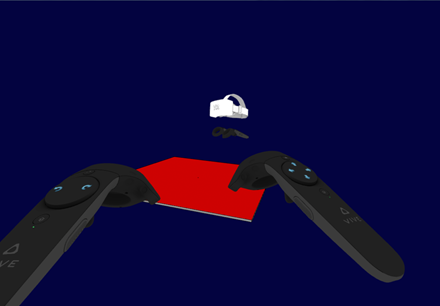
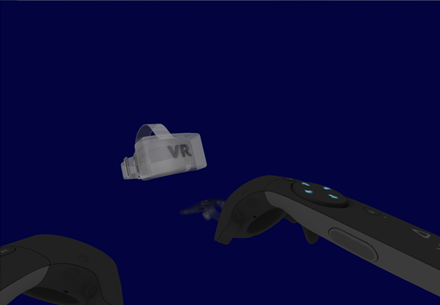
The 3D avatar of each immersed participant is displayed when 3DMessaging starts. 3D avatars are visual entities used to collaborate with other remote participants. They can be used to convey intents or share information through gestures.
> 3DMessaging.
The 3D avatar of each immersed participant is displayed when 3DMessaging starts. 3D avatars are visual entities used to collaborate with other remote participants. They can be used to convey intents or share information through gestures.The HMD representation and the controller representation of each avatar match the position and the orientation of the user's head and hands.

The closer you navigate to an avatar, the more translucent it becomes (and disappears if you are too close).

Important: A collaborative review can have at the same time immersed and nonimmersed participants but only immersed participants can visualize and interact with the 3D avatar of other immersed participants. -
Perform the appropriate action.
Action Description Partially press the trigger and aim the right controller toward the HMD of a 3D avatar. Displays a laser starting from the controller and ending on the HMD. The 3DMessaging identity of the associated remote immersed participant is also displayed above the tip of the controller. Completely press the trigger of the right controller. Updates the HMD's position and orientation so that your point of view matches the one of the remote immersed participants associated with the 3D avatar. Roughly aim the controller at a 3D avatar. Lets you select the pointed 3D avatar with the laser. - A participant can activate or deactivate the HMD command during the collaborative review, switching between immersed and nonimmersed status.
- An immersed participant can leave the collaborative review while the HMD command is still running.
-
To quit the command, click HMD
 .
.
| See Also |
| About XML Configuration Files |