Managing Viewpoints | ||
| ||
- Open a model.
-
From the AR-VR section of the action bar,
click Viewpoints
 .
.
-
In the Viewpoints dialog box, click the appropriate icon to define
a viewpoint.
Command Description 
Defines a flying viewpoint. You can use this viewpoint whenever you are up in the air or below the ground.

Defines a standing viewpoint. This viewpoint lets you choose a surface on which you stand.

Defines a viewpoint with 6 degrees of freedom. This viewpoint is the similar to the flying viewpoint, except for the orientation: in standing and flying viewpoints, you are still parallel to the ground whereas with this viewpoint, you are looking from a totally random orientation.
This viewpoint is intended for confirmed users, as it can be confusing.

Creates a new template for seat buck alignment. Seat Buck lets you align the virtual scene with a physical seat to experience the design from a seating position.
Each viewpoint you define is displayed in the List area below.By default, a flying viewpoint
 is created (named
Fly Viewpoint 1), that replicates the viewpoint on the 3DEXPERIENCE's main viewer.
 -
When a viewpoint is created, you can do one of the following:
- Rename it by double-clicking the viewpoint name in the list.
- Delete it by pressing Del.
-
Click Get Values from Viewer to copy the 3DEXPERIENCE's main viewpoint.
Note: This command is relevant for flying
 and free
  viewpoints
only.The viewer in the Viewpoints dialog box and the values of the options below are updated accordingly.
-
Click Pick Position, then click a surface in the 3DEXPERIENCE's main viewer.
You appear to be standing on the surface (and you can manually update the orientation afterward.)
 Note: This command is relevant for standing viewpoints
 only.
only. -
To switch between viewpoints, click a viewpoint in the list.
This updates the values on the right side of the Viewpoints dialog box.
The viewer on top of the panel lets you see in real time the viewpoint you are creating or updating.
-
Define viewpoint options.
Option Description Use wide angle Lets you see the viewpoint in the viewer with a focal length that approximates the focal length in an HMD. This option is activated by default. If you clear it, the focus is restored to the main viewer.
User Height This parameter is available for standing viewpoints  only.
It is used on a desktop to show in the panel’s viewer the correct required
viewpoint.
only.
It is used on a desktop to show in the panel’s viewer the correct required
viewpoint.In VR, you do not use this parameter.
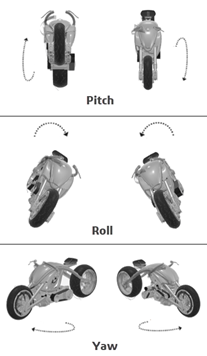
Position and Orientation These options show data for the current viewpoint. You can manually change the viewpoint by specifying your own values. Orientation data is as follows:

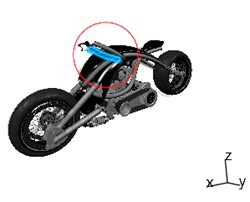
Step size Defines the respective step size to be used when scrolling. Pick Target Defines a viewpoint’s orientation. To do so, click the option, then click an object in the 3DEXPERIENCE's main viewer. The viewpoint is centered on the clicked point and is referred to as "point of interest" (POI).
It appears as a red circle in the viewer and in VR if a VR scenario is launched.

Clicking this option lets you access additional options.
Display Point of Interest Shows or hides the point of interest in the viewer. Position Automatically defined when you choose a POI in the scene, but you can manually update it. Radius Automatically defined when you choose a POI in the scene, but you can manually update it. Fade after Specifies the time after which the POI disappears. By default, the POI appears when switching to the viewpoint, then it disappears. If you clear this option, the POI stays visible.
-
Click Apply.
This applies the current viewpoint on the 3DEXPERIENCE's main viewer, and in VR if a scenario is active.
-
From the AR-VR section of the action bar, click a VR command.
For example, click HMD Emulator Configuration
 ,
and then HMD Emulator
 .
. -
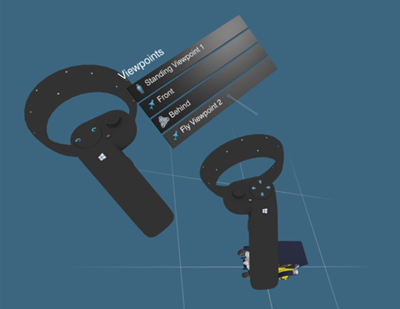
Click the right grip to display the list of viewpoints.
A panel with the list appears on the left controller.

-
Use the right trigger to click a viewpoint in the list.
You teleport so as to have the same viewpoint as defined in the Viewpoints panel.
-
Click the Create viewpoint option on the controller.
A new viewpoint is created using the current model view.
Important: The created viewpoint is visible in the VR list but not in the Viewpoints dialog box. - Click the right grip to hide the list.
-
To exit the command, click Viewpoints
 .
.