Using the Content Chooser

You can load objects in session by running the Content Chooser. This capability is used in many commands that require a query on objects. In this scenario, the Content Chooser is opened in the Product Structure Design app with the Insert Existing Product command.

Most apps use this version of the Content Chooser, but some apps and batches use the classic version. For more information, see Using the Classic Content Chooser.

This task shows you how to:


Before you begin: The user interface can differ from one app to another, and may display other tabs. For app-specific information, see the documentation of interest.

Selecting Objects Using the Content Chooser

You can select the objects in any tab, but also in the Search Results.

Before you begin: Create a new product.
  1. In the Product Structure Design app, select Insert Existing Product in the Product Edition section of the action bar.

    You can run this command either from an empty product or from a product that already contains geometric objects. In this scenario, the command is run from an empty product.

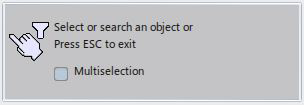
    The following dialog box appears:

  2. Do either of the following:
    • Select a product in the tree of your authoring or navigation tab. You can also make your selection in the working area first, then run the Insert command.
    • Type your search criteria in the Search box and click . The Search automatically switches to the Applicative Search. Select Advanced Search in the list.
      Note: When launching the Advanced Search, the easy tab is the only tab available.
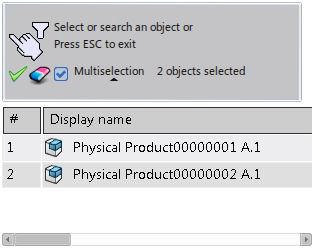
    • Check the Multiselection check box to insert one or more objects at a time in your session. The list of the selected objects appears.

    The mouse arrow changes when you hover over an object that you can select or not. When you enable acquisition mode from the Content Chooser, the hand selection symbol does not display to select objects from the search results.
    Notes:
    • To delete an object from the list of selected objects, click Remove in the context menu or Remove All .
    • The Content Chooser is an acquisition agent whose content can be enriched with objects you select in different tabs. Thus, the selection in the current tab may differ from the Content Chooser's content.

Once you click Accept, all the objects you have selected are now added in the assembly.

Loading Objects from a File

The Import a File link lets you import external content in your session, if the application you are using requires external content.

The application can specify any kind of file formats. If no format has been defined, the default file formats are listed below:

*.bmp*.pdf*.xlsb
*.csv*.png*.xlsm
*.doc*.ppt*.xlsx
*.docm*.pptm*.xlt
*.docx*.pptx*.xltm
*.gif*.prn*.xltx
*.jpe*.tif*.xml
*.jpeg*.txt
*.jpg*.xls

Extensions are filtered according to the application you are using.

The scenario below takes a design table as an example. A design table is designed to drive the parameters of a 3DEXPERIENCE document from external values. These values are stored in the form of a table either in a Microsoft Excel file on Windows or in a tabulated text file.

  1. Create a sample as explained in the Knowledge Basics User's Guide: Managing Relations: Design Table: Creating a Design Table from an Existing File.
  2. In the Tools section of the action bar, click Design Table .
    The Creation of a Design Table dialog box opens.
  3. Click OK.

    The following dialog box appears:
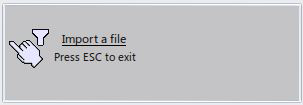
  4. Click the link Import a file.
  5. In the File Selection dialog box, select the type of file in the Files of type box, then browse your file tree to select the file to be imported. In our scenario, we import a .xls file.

    Important:
    • You can only select one file.
    • Next time you access the Content Chooser, the Look in list will display the last directory in which you selected a file.

  6. Click Open then enter at least a representation name (a default one is provided).
  7. Click the arrow to check the selected file, and then click the green check to validate the selection.
  8. Click OK to validate the Design Table creation.

    A dialog box asks you whether you want to perform automatic associations between the design table columns and the document parameters that have the same name: Click Yes.

    A multirow design table is created. When you click Edit table... (at the bottom of the dialog box), you can see that the values stored in the file you imported are displayed.