About Limit Contours and Limit Contour Groups

You can apply Limit Contour:

  • To one single ply or cut-piece to relimit the contour of the selected entity.
  • Or to several plies, either selected as plies, or as a plies group or a stacking. In this case, Limit Contour creates a Limit Contour Group. The Limit Contour Group creates a limit contour on each single ply or cut-piece, and applies a staggered value to the limit contour of each single ply or cut-piece.
  • Display of elements can be customized in the Colors section of Display in Main Preferences.

This page discusses:

Limit Contour Groups

Each creation of limit contours creates a Limit Contour Group.

  • A Limit Contour Group is created automatically when you create limit contours for several plies, either by selecting the relimiting curves or by reading a staggering file.
    Notes: When you create a limit contour for one single ply, only this limit contour is created (no Limit Contour Group).
  • One Limit Contour Group points to all the limit contours created at the same time. If several limit contours creations have created several Limit Contour Groups, each Limit Contour Group points to its own limit contours.
  • This Limit Contour Group is editable by double-click, enabling thus the modification of all the plies in one shot.
  • The edition dialog box is the limit contour dialog box, even if the limit contours have been created by reading a staggering file.
  • When you edit a Limit Contour Group, remove limit contours by removing the corresponding plies in the Entity multiselection dialog box.
  • Limit contours are editable on their own.
    Note: Local modifications of a limit contour are lost when you edit the corresponding Limit Contour Group.
  • The Parents/Children command on a Limit Contour Group displays the relations between plies and limit contours
  • Deleting a Limit Contour Group deletes all the limit contours linked to this group.
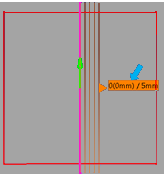
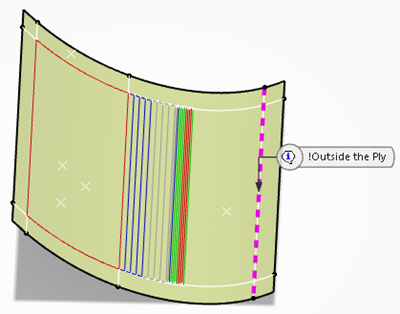
  • On the Fly Information is available on Limit Contour Groups.

You can create Limit Contour Groups for Composites parts created in a previous release.

Limit Contours

You can assemble several curves into a limit contour.

As you pick the curves, a contour is proposed in pink, with an orientation in green. Orientation on other curves is dimmed. Adjust the orientation of the curves as you pick them.

You can also define several limit contours from the same set of curves, provided they do not intersect, and they start and end outside the ply boundary.

You can select a curve several times, provided you have selected at least another one in between.

Selection of multidomain curves is not allowed, except for one single curve such as Curve.1 in the example below.

The curves are joined, either by extrapolation

or by filling gaps

Select the method in the main dialog box (Extrapolation Join Type or Gap Fill Join Type).

The first and last curves of an assembly of curves

are extrapolated.

not closed

In such a case

The curves are extrapolated if no staggering is added

whereas a gap fill is added if a staggering is added

Use the gap fill method for limiting curves outside the ply area

Collapsed curves are ignored:

Default curve orientation or matter side are 1, inverted are -1. You can combine curve orientation and matter side to create your own matter area pattern. For example, this case

results in 8 proposals.

Curve.1 Curve.2 Matter Side Output
1 1 1

1 1 -1

1 -1 1

1 -1 -1

-1 1 1

-1 1 -1

-1 -1 1

-1 -1 -1

Curve orientation, relimiting direction and matter side are stored in the Limit Contour feature, but not in older models.

Edit older limit contours to upgrade them. Curve orientation and relimiting direction are retrieved automatically from the geometry, and are editable.

Older limit contours groups may also require an update. Messages help you through the process.

Feedback

Visual feedback helps you understand and correct errors. Display is not editable unless stated otherwise.

Curve Orientation
The orientation of the current curve is displayed in green, that of other curves is displayed as a Low-intensity elements (Editable in Preferences). Click the green arrow to invert the orientation of the current curve (same as Curve Orientation Invert).

Staggering Manipulator
The staggering direction is represented by a triangle displayed as highlight (Editable in Preferences), with text information Staggering Step(Initial offset)/Staggering value.

Staggered curves are shown. Their number is equal to the number of plies in the Limit Contour Group less one.

All the staggering handles with the same staggering values are shown in the same color.

Multiselection of staggering handles is supported. Click any of the selected handles to invert the direction of all.

Matter Side
The matter side is represented by a red arrow, after Multiselection is closed. Click the arrow to invert the matter side (same as Staggering Direction Invert).

The previous contour is displayed as Selected edges, matter areas are displayed as Preselected elements (Both editable in Preferences).


Inconsistent Curve Orientation
Curves with inconsistent orientation are displayed in red.

Tip: When an inconsistency if detected in fill gap mode, the orientation of the last selected curve is automatically inverted. However, it is still editable.
Invalid Matter Side
Invalid matter side is shown in red with an information text, matter is not shown.

Multi-domain Matter Areas
Multidomain matter areas are shown as Update needed (Editable in Preferences) with an information text.

Ignored Curves
Curves outside the ply area are displayed as dotted lines, with a text information.

Upgrade

Upgrade is proposed for legacy Limit Contours and Limit Contours Groups.

Limit Contour Upgrade
  • Curve orientation and matter side are deduced automatically from legacy limit contours.
  • Old data model is upgraded to new data model.
  • If an update error occurs, edit the limit contour to correct the curve orientation or matter side.
Limit Contours Group
Upgrade is proposed if at least one limit contour in the group needs to be upgraded. Proceed as explained in the messages.