-
Right-click a stacking or
a selection of plies group and select Coincident Edge Analysis.
-
Select either a group of EOP or geometry under one group of EOP.
Multiselection is supported.
Coincidences found on EOP are ignored. - Optional:
Select the Auto Computation check box.
- Selection of EOP is no longer possible.
- A temporary external contour is computed. Coincidences on this contour are ignored.
-
Click
Run Coincidence Check.
- Potential coincidences are computed and identified with a 0.1 mm tolerance.
- Results, if any, are displayed
- In the dialog box: Index, first and second features causing the coincidence, type of the coincidence.
- In the 3D area, overlap coincidences are displayed in red, butt coincidences in blue.
- Overlap coincidence

- Butt coincidence

- If EEOP have been selected, EOP boundaries are displayed in orange. Only coincidences not on EOP boundaries are displayed.
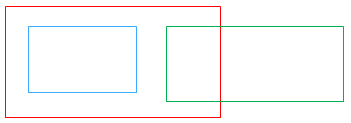
Below are some examples of coincidence detections, where the edges of plies are represented by thin colored lines, and the coincidence by a thick green line. In the examples below, no detection has been detected. -
Select the required option to filter the results.
- Select one coincidence in the dialog box.
A reframe is performed and information is displayed in the 3D area. - Alternatively,
- Select several coincidences in the dialog box to display their information in the 3D area.
- Right-click a coincidence in the dialog box to perform a reframe or a center graph.
- Select one coincidence in the dialog box and the Display Plies check box.
- The ply or cut-piece shell of the first coincidence element is displayed in white, that of the second element is displayed in black.
- Overlap shell, if relevant, is displayed in gray.
|