- Insert the engineering representation in a
product.
- Go to Generative Shape Design.
- Select ,
-
Right-click the body you have created and select ,
- Click OK in the message box that is
displayed.
An empty PartBody is created.
- From the Composites Collaboration section of the action bar, click Manufacturing Stacking
 .
.
- Under Create Manufacturing Stacking in select the empty 3D Shape Representation
where you want to create the manufacturing stacking.
- Select the creation method.
- As Result - Complete (Recommended):
- Features that are stacking inputs are converted to datums.
- Stacking features such as plies group rosettes and surfaces, cores, plies contours, neutral fiber, flatten plane, EOP... are also converted to datums.
- Depending on their impacts on other features, some other features are also converted to datums.
This method results in a good performance, a lighter and more stable manufacturing stacking.
- As Result - Contours only:
- All the composites features are created and synchronized as such in the manufacturing stacking, except for contours:
- History of the ply contours is not kept.
- The links to geometry are not kept, except that to the support surface.
- All the features constituting the engineering contour are merged into one As Result contour. This As Result contour is managed as any other contour (for example, you can apply material excess or darts to it).
This method increases the performance, reduces the size of the manufacturing stacking. No need to validate the manufacturing data in case of updates.
- All specs:
- All the composites features are created and synchronized as such in the manufacturing stacking, together with their inputs.
This method increases the computation time and the size of the manufacturing stacking.
When a As Result method is selected, synchronization on the resulting manufacturing stacking is available:
- The control is done ply by ply.
- A status is displayed for each ply:
The details of the modification are only listed during the creation of the manufacturing stacking or during synchronization.
The contours in the As Result manufacturing stacking are marked with a red cross.
The manufacturing stacking is created according to the selected method.
| Engineering Stacking

| Manufacturing Stacking: All Specs
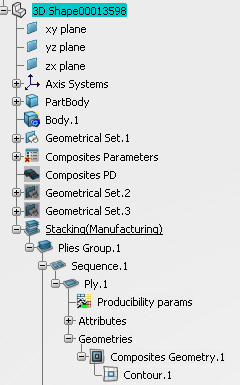
|
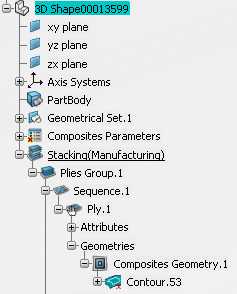
| Manufacturing Stacking: As Result - Complete
| Manufacturing Stacking: As Result - Contours only
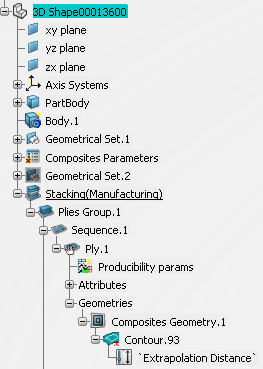
|