Merging Plies | ||||
|
| |||
-
From the Plies Design section of the action bar, click Merge Plies
 .
Note: You are in Ply mode, meaning you merge plies. You can switch to Sequence mode, meaning you merge sequences.
.
Note: You are in Ply mode, meaning you merge plies. You can switch to Sequence mode, meaning you merge sequences.- You deal with couples of sequences.
- Whenever possible, plies are merged within the final sequence in one shot, whereas several merges would be required in Ply mode.
- This dialog box can be resized for a better display of the information.
- Optional: Select the Check connections check box and enter required values.
- Check connections is not selected.
- Maximum deviation and Angle threshold are not accessible. They become accessible and editable once Check connections is selected.
- Maximum deviation is 0.001 mm.
- Angle threshold is 0.5 deg.
The status of Check connections, and the values of Maximum deviation and Angle threshold are modal.
- The distance of the vertices of a common edge and the two angles at the vertices are verified.
- If the distance and the angle are below the Maximum deviation and the Angle threshold, the connections are valid. Plies can be merged.
- If Prevent merge is selected, a KO status is displayed, the plies are not merged.
- If Prevent merge is cleared, a warning is issued. Right-click to merge or not the plies.
The position of the vertices of a common edge
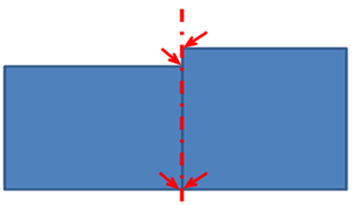
and the two angles at the vertices are verified.
- If the distance between two vertices is within the Maximum deviation, and the angle is within the Angle threshold, the connections are valid and the plies are merged.
- If the distance between two vertices is greater than the Maximum deviation, or the angle is greater than the Angle threshold, the connections are not valid:
The merge is performed:
- The plies that have been removed from the list of plies to be merged have remained untouched.
- All the other plies to be merged have been moved to the sequence of their counterpart of the reference plies.
- Whenever possible, the geometries of the plies to be merged have been merged and a new contour has been created.
- Otherwise, the ply to be merged has been moved to the sequence of the reference ply.
When a ply to merge has no associated reference ply, and when this ply belongs to a sequence with at least one ply that will be correctly merged, a message is displayed, asking for your confirmation. If you click OK, the ply with no associated one follows the merged ply in the same sequence.
When:
- A ply to merge has no associated reference ply, but does comply with the case above,
- This ply belongs to a sequence whose plies are all to be merged,
- A couple of plies that can be merged correctly exist right before this ply in the stacking order,
A message is displayed, asking for your confirmation. If you click OK, the complete sequence containing this ply with no associated ply is moved right behind the sequence containing the above-mentioned mergeable couple of plies.