Comparing 2D Objects | |||
| |||
-
From the Markup section of the action bar, click 2D Compare
 .
Depending on the type of the document of the first sheet to be compared (that is, a layout, a functional or logical sheet, or a drawing sheet), the Search results panel displays all the revisions of the first sheet.Note: If you do not want to compare the selected object with one of its revisions, you can search for another object.
.
Depending on the type of the document of the first sheet to be compared (that is, a layout, a functional or logical sheet, or a drawing sheet), the Search results panel displays all the revisions of the first sheet.Note: If you do not want to compare the selected object with one of its revisions, you can search for another object. -
To select the second sheet for comparison, select a search result, and click
OK.
The comparison result is displayed. The geometries of the first sheet are displayed in red
 , those of the
second sheet are displayed in green
, those of the
second sheet are displayed in green  , and the common
geometries are displayed in black
, and the common
geometries are displayed in black  .
.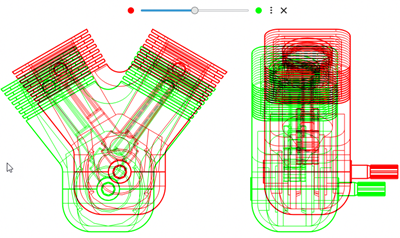
Tip: You can change the colors representing the two sheets and the common geometry from the preferences. For more information, see Compare. - Optional:
Move the comparison slider at the top, toward the left or the right, to control the
opacity of the first or second objects in the comparison result.
Notes:
- The opacity value of the slider is stored in the slide when you create it. After the slide is created, you can always move the comparison slider to change the opacity of the compared objects. This does not modify the opacity value stored in the slide.
- If the second document contains more than one sheet, click
 next to
the comparison slider and select the required sheet from the list, as the second
object for comparison. The comparison result is automatically updated.
next to
the comparison slider and select the required sheet from the list, as the second
object for comparison. The comparison result is automatically updated.
Table 1. Compare Results at the Extremities of the Slider Slider at Extreme Left Position Slider at Extreme Right Position 
Only the first product (By default, in red
) and
the common part (By default, in black .) is
visible.
Only the second product (By default, in green
) and
the common part (By default, in black .) is
visible.