You can add a straight or curved section to the conveyor.
-
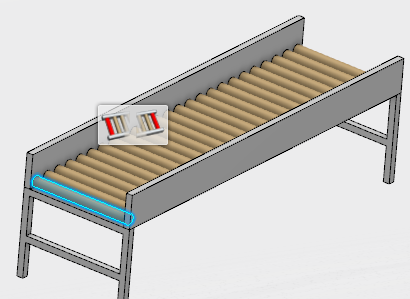
In the New Roller Section panel, select either Straight or Curved.
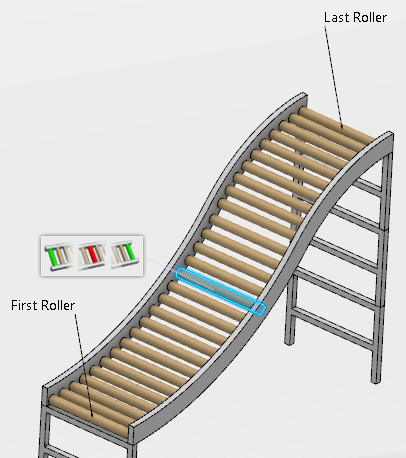
The Section elements selection section indicates in red that there are two rollers (First Roller and Last Roller) that must be selected in the work area before the section can be added.
-
Select the first cylinder in the
work area.
A context toolbar appears and provides commands for First Roller and Last Roller that allow you to validate each selection you make.
- Click
 to validate the selection for the first roller.
 The command for the first roller becomes green

and an annotation appears in the
work area pointing to the first roller.
- Select the last cylinder in the work area.
The context toolbar points to the selection.
- Click
 to validate the selection for the last roller.
The command for the last roller becomes green  and an annotation appears in the work area pointing to the last roller.

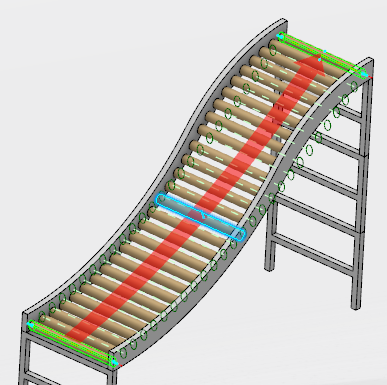
When the required selections have been made, the New Roller Section panel indicates in green that two rollers (First Roller and Last Roller) have been validated.
- Click Finish to finalize the conveyor section initialization.
The conveyor 3d shape and the new section are displayed transparently. The red arrow indicates the conveying direction. Green rollers are respectively the first and the last roller of the section.

Note:
If the conveyor section is not powered, the arrow is not displayed.
The Section Properties panel appears, and allows you to make any adjustments to the generated section or its rollers before creation.
Note:
The Section Properties panel can be accessed any time by double-clicking a section in the tree or work area after it has been created.
- Click OK.
The section is created.
 .
The Conveyor Section Type panel appears.
.
The Conveyor Section Type panel appears.

 to validate the selection for the intermediate roller.
 and an annotation appears in the