Create an Object Profile
This task shows you how to create an object profile.
-
In the Motion Controller section of the action bar, click Object Profile
 .
You are prompted to select the resource that the object profle will be attached to.
.
You are prompted to select the resource that the object profle will be attached to. -
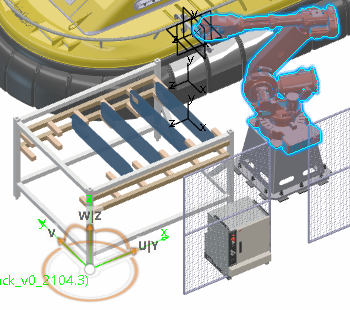
Select a robot in the work area.
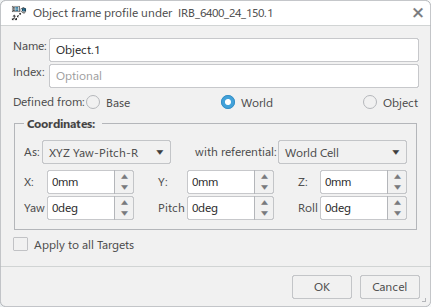
The Object Frame Profile dialog box appears.
The orientation Robot also moves to the world origin.
-
In the Defined from: section, select the context
that coordinates are evaluated from.

- Base: Coordinates are evaluated from the base port of the robot.
- World: Coordinates are evaluated in the local context.
- Object: Coordinates are evaluated with
respect to a specified object in the work area, such as:
- A tag
- An axis system
- A product within the same cell as the robot
When Object is selected, you are prompted to select an object in the work area that will act as the reference object.

Upon selection, the orientation Robot snaps to the selected object.
-
In the Coordinates section, select the format in
which the coordinates will be expressed from the As:
list.

-
From the with referential list, select the origin
from which coordinates are displayed.

-
Coordinates (X, Y,
Z, Yaw,
Pitch, Roll) can be
entered directly, or manipulated via the orientation Robot in the work area.

-
Click OK to create the object profile.
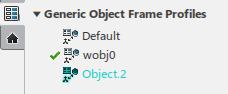
The new profile appears in the Profiles side tab for the selected robot.