Command Dialog Boxes and Editors

The Edit command appears to the right of the boxes for the items listed in this topic, from different dialog boxes (as Component Parameters Edition), to let you edit an input with its convenient dialog box or editor.

Note: The Edit button can also appear in other locations where e.g. matrix values are to be changed. One example is in function call dialog boxes.

This page discusses:

Edit a Matrix or an Array

For a matrix or array the Edit command displays a matrix editor.


The use of this editor is described in Working with the Matrix Editor.

Note: For an array of records, the Load, Save and Plot commands are not available.

Select Resources

For a file selection the Edit command may display a Select Resources dialog box.

The alternatives of the Select Resources dialog box are

  • Select File to browse for a file.
  • Modelica Resources to select from resources.
  • Resource Table to select from resource tables.

For an example of using this dialog to select from resource table, see Use the Resource Table.

Note: This dialog box can also appear in selections not using the Edit command, for example, when adding a picture in the diagram. See Adding a Picture.

Text

For a text the Edit command displays a text editor.

Hierarchical Modifier

For a hierarchical modifier the Edit command displays a secondary Component Parameter Edition dialog box for the modifier.

This dialog box is described in Displaying and Editing Modelica Parameters.

Color

For a color the Edit command displays a Color dialog box.


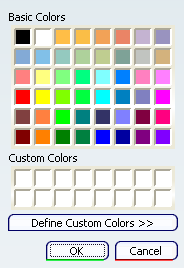
If you click Define Custom Colors >>, the dialog box is enlarged to display more options:

Basic Colors
In this area, you can select a predefined color then click OK to close the Color dialog box and add the color in the color box.
Custom Colors
In this area, you can define a color using the color palette or modifying the following values:
  • Hue, Sat and Lum to define hue, saturation and luminescence.
  • Red, Green and Blue to give a color definition.

You must click Add to Custom Colors to validate your custom color definition, select a color then click OK to close the Color dialog box and add the color value in the color box.