Extracting a Collision Point

You can use the Extract command to replace a start, end, or intermediate point in collision with the context.

This task shows you how to:


Before you begin: The session data includes a Track on a product in a simulation context with a start, end, or intermediate point in collision.

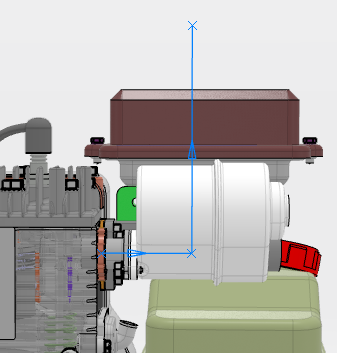
Extract a Point Along an Axis

You can select the direction in which you want to extract your point.

  1. Click a Track and from the Simulation section of the action bar, click Path Planning .

    Default start and end points are set on the first and last points. The start point is in collision.


  2. Select the start point and in the contextual toolbar, click Extract .

    Note: The Extract command is also available when you select a T-point in the T-point information tab of the Path Finder Parameters panel.

  3. In the Extract panel, select Along Axis.
  4. Select an axis of the Robot to indicate the direction for the extraction.

    Note: You can rotate the Robot to any direction and place it on T-points, or on the context.

  5. Click Extract in the panel.
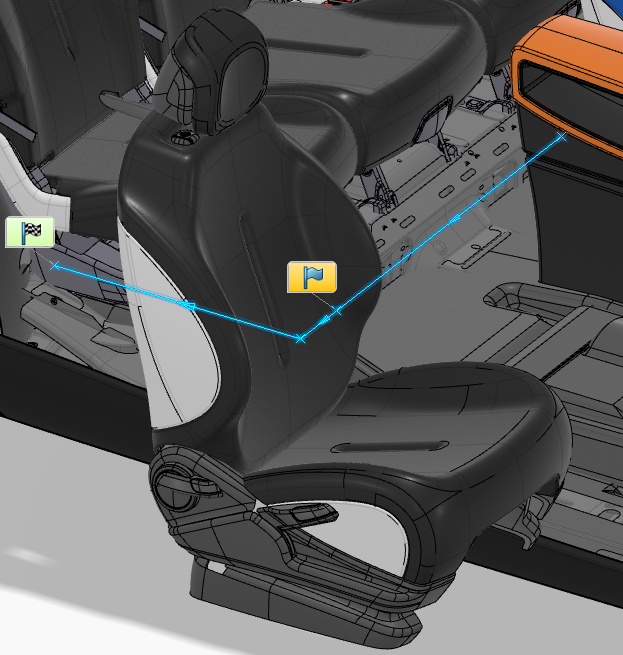
    A new collision-free start point is created in the defined direction. The new point is inserted after the first point.

  6. Click OK in the context toolbar to save the Track.

Note: In the Path Finder panel, selecting Extract points in collision before finding track automatically replaces entered points in the collision path.

Extract a Point to Any Direction

You can define a maximum radius for your search of extracted points.

  1. Click a Track and from the Simulation section of the action bar, click Path Planning .

    Default start and end points are set on the first and last points. The start point is in collision.


  2. Select the start point and in the contextual toolbar, click Extract .

    Note: The Extract command is also available when you select a T-point in the T-point information tab of the Path Finder Parameters panel.

  3. In the Extract panel select Any direction, and enter a maximum radius.

    Note: You can also modify the default maximum radius in Me > Preferences > App Preferences > Simulation > Manufacturing Process Documentation > Assembly Path Optimization > Path Finder.

  4. Click Extract in the panel.
    A new collision-free start point is created within the maximum radius. The new point is inserted after the first point.

  5. Click Find Track in the context toolbar.
    The Track is generated and all the points in the Track are collision-free.
  6. Click OK in the context toolbar to save the Track.

Note: In the Path Finder panel, selecting Extract points in collision before finding track automatically replaces entered points in the collision path.

Extract to Any Direction with an Angular Restriction

You can define a direction and an angle to specify a restricted research domain during extraction.

  1. Click a Track and from the Simulation section of the action bar, click Path Planning .


  2. Select the start point and in the contextual toolbar, click Extract .

    Note: The Extract command is also available when you select a T-point in the T-point information tab of the Path Finder Parameters panel.

  3. In the Extract panel, enable the Restrict research area option, and specify the radius for the angle.
    The Extract command is disabled and the angle editor is enabled.
  4. Select the Z axis on the PLM Robot.
    The panel is updated with the Z axis and the Extract command is enabled.
  5. Click the Extract command.
    A new collision-free start point is created within the maximum radius. The new point is inserted after the first point.

  6. Click Find Track in the context toolbar.
    The Track is generated and all the points in the Track are collision-free.
  7. Click OK in the context toolbar to save the Track.

The Track is created with the new start point with an angular restriction.