Create the Required Tool Profiles
Tool profiles must be created for both the tool performing the arc operation (welding, sealant, etc.) and the tool that grabs the product, moves it to the tool perfoming the operation, and releases it at a specified location.
Click Play to watch the video:
-
From the Setup section of the action bar, click New Tool Profile
 .
You are prompted to select a resource to create the profile under.
.
You are prompted to select a resource to create the profile under. -
Select the robot.
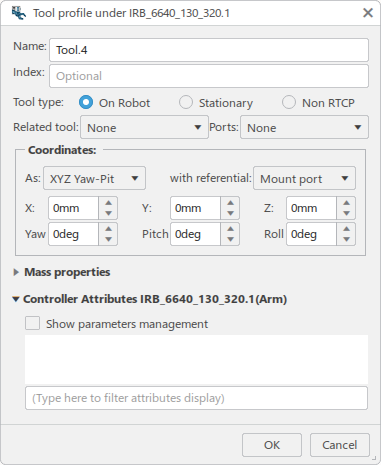
The Tool Profile dialog box appears.
-
Define the profile for the fixed TCP tool (in this case, a gluing tool).
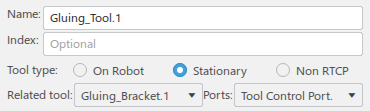
- Define a meaningful Name: for the profile.
- For a fixed TCP tool, select Stationary for the Tool Type:.
- Select the Related tool: from the list or in the work area.
- Select the port of the selected tool in the Ports: list.
- Click OK to create the profile.
-
Define the profile for the tool on the robot that will grab and release the product.
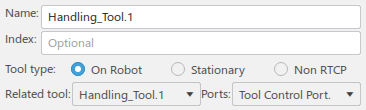
- Define a meaningful Name: for the profile.
- Select On Robot for the Tool Type:.
- Select the Related tool: from the list or in the work area.
- Select the port of the selected tool in the Ports: list.
- Click OK to create the profile.
The new tool profiles appear in the Profiles side tab. 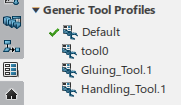
 .
.

 .
.

 .
.
 and select
the robot.
and select
the robot.

 for
for