About Customizing Ratio Data in Data Setup | ||
| ||
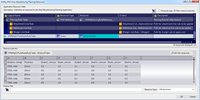
The file must contain the following column header:
- Material: Name of the plate material type, for example, STEEL A36. Then this rule applies only to STEEL A36 material.
- Thickness: Thickness value of the plate, for example, 10mm means that this rule applies only for 10mm of each material.
- Outer contour: This column decides the ratio value for the outer contour. There are three chapters Minimum - minimum value of ration, Maximum - maximum value of ratio, Intervals - the interval between ratio values. In this example, Minimum: 0.7, Maximum: 1.2, Interval: 0.1, In this case, the ratio value is 0.7, 0.8, 0.9, 1.0, 1.1, 1.2
- Marking line: This column decides the ratio value for the marking line. There are three serve chapters minimum, maximum, intervals. Those sections are the same as above.
In Data Setup, a new data sheet is attached in the MaterialTable for ratio value. This data sheet is applied in each tab page on the shrinkage process dialog to modify Mfg features with the Edit Process command.
An example is if the material and thickness of plate used is STEEL A36 and the thickness is 10mm. The ratio values of OuterContour and MarkingLine are defined 0.5, 0.6, 0.7, 0.8, 0.9, 1, 1.1, 1.2, 1.3, 1.4, 1.5.
This data sheet can be modified to support customization using  Edit the resource. Click and the excel sheet appears and modify. The
table automatically updates as soon as the file closes with a save.
If you do not create or change the new data sheet, the rule table has a default data sheet. So you can modify the Mfg feature for shrinkage compensation.
After shrinkage process and Mfg feature generation, you can manipulate a feature modification with the Edit Process command. In each tab page on the shrinkage process, you can inspect and apply ratio values to customize in the Data Setup.
If the ratio value changes for the STEEL A36 and 10mm thickness plate like the case of above, the ratio value applies. Review the result in the shrinkage process.

