Creating a Motion Trace on Event
You can create a motion trace on event with the Choreography
dialog box to start the display of a motion trace. During simulation, this event will override
any active global motion trace probe.
-
In the Activities Process Tree, right-click a machining operation and select Choreography.
-
In the Choreography dialog box that appears, click
Create Motion Trace On
 . .
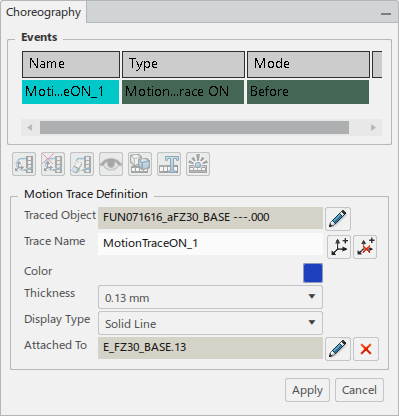
The Motion Trace Definition section appears in the
dialog box and other choreography commands are disabled.
-
To choose which object you will trace, click select object to be
traced
 under Traced Object, then select an
object from the tree or the work area. under Traced Object, then select an
object from the tree or the work area.
-
To edit the trace name, enter the name in the Trace Name
section, then click Define an offset for the trace
 . .
-
Click an object from the tree or the work area
then click OK
 to validate. to validate.
You have defined the offset for the trace. Note:
You can remove the offset by
clicking Remove offset defined for the trace
 . .
-
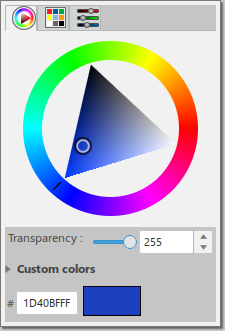
To edit the color, click the white box under Color and choose
a color from the panel.
-
To specify the thickness, choose a value in mm from the
Thickness list.
-
To specify the display type, choose the line and shape from the Display
Type menu.
-
To specify which machining operation to attach the trace to, click Select object to attach trace to
 under Attached To. under Attached To.
-
Click a machining operation from the tree or the work area.
-
To remove the object from the Attached To section, click
Remove object to which trace has been attached
 . .
-
Click Apply.
The Motion Trace Definition section closes and you can
reopen the section to further edit the motion trace by double-clicking the event in the
Choreography dialog box.
You have created a motion trace on event and it is listed in the
Choreography dialog box.
Note:
If
you require a scenario where you persist the motion trace definition, then use the motion
trace event on a machining operation. Sometimes you require a scenario where you enable the motion trace for any simulation
from the start to end and do not need to persist it. In that case, use the motion trace
probe.
Creating a Motion Trace Off Event
You can create a motion trace off event with the Choreography
dialog box to end the display of a motion trace. During simulation, this event will override
any active global motion trace probe.
-
In the Activities Process Tree, right-click a machining operation and select Choreography.
-
In the Choreography dialog box that appears, click
Create Motion Trace Off
 . .
-
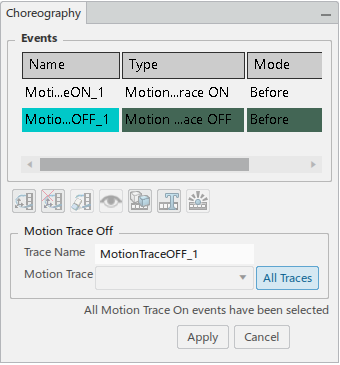
In the Motion Trace Off section of the dialog box that
appears, edit the event name in the Trace Name section.
-
Choose a motion trace from the list in the Motion Trace
section.
The motion trace you selected is in the dialog box. Note:
You can select all
motion trace on events in the scenario by clicking All Traces.
When you click this command, a message appears in the dialog box that confirms you
have selected all events.
-
Click Apply.
The Motion Trace Off section closes and you can reopen
the section to further edit the motion trace off event by double-clicking the event in
the Choreography dialog box.
You have created a motion trace off event and it is listed in
the Choreography dialog box.
Note:
If
you require a scenario where you persist the motion trace definition, then use the motion
trace event on a machining operation. Sometimes you require a scenario where you enable the motion trace for any simulation
from the start to end and do not need to persist it. In that case, use the motion trace
probe.
Creating a Motion Trace Clear Event
You can create a motion trace clear event with the Choreography
dialog box to start the display of a motion trace clear event.
-
In the Activities Process Tree, right-click a machining operation and select Choreography.
-
In the Choreography dialog box that appears, click
Create Motion Trace Clear Event.
-
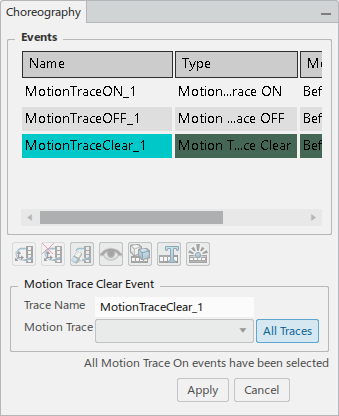
In the Motion Trace Clear Event section of the dialog box that
appears, edit the event name in the Trace Name section.
-
Choose a motion trace from the list in the Motion Trace
section.
The motion trace you selected is in the dialog box. Note:
You can select all
motion trace on events in the scenario by clicking All Traces.
When you click this command, a message appears in the dialog box that confirms you
have selected all events.
-
Click Apply.
The Motion Trace Clear Event section closes and you can
reopen the section to further edit the motion trace clear event by double-clicking the
event in the Choreography dialog box.
You have created a motion trace clear event and it is listed
in the Choreography dialog box.
Note:
If you require a scenario where you persist the motion trace definition, then use
the motion trace event on a machining operation. Sometimes you require a scenario where you enable the motion trace for any simulation
from the start to end and do not need to persist it. In that case, use the motion trace
probe.
Creating a Visibility Event
You can create a visibility event with the Choreography dialog
box to hide or show a product or resource.
-
In the Activities Process Tree, right-click a machining operation and select Choreography.
-
In the Choreography dialog box that appears, click
Create Visibility Event
 . .
-
In the Visibility Action dialog box that appears, edit the event
name in the Name section.
-
Select an object for the event in the tree or the work area.
-
To show your selection, click Show Selection.
Your selection is viewable in the work area. 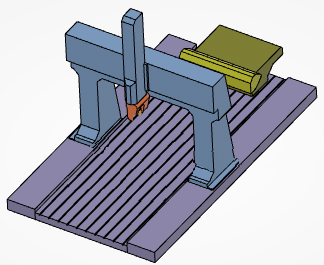 -
To hide your selection, click Hide Selection.
Your selection is hidden in the work area. 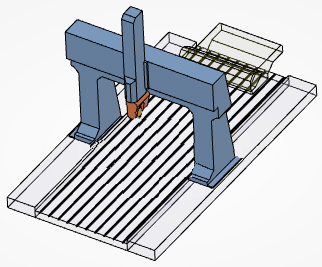 -
Edit the duration by entering a value or using the arrows in the
Duration section.
-
Click OK.
The Visibility Action dialog box closes and you can
reopen it to further edit the visibility event by double-clicking the event in the
Choreography dialog box. 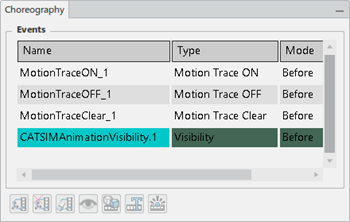 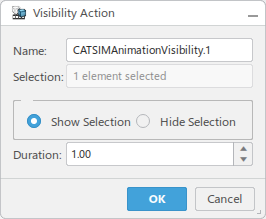
You have created a visibility event and it is listed in the
Choreography dialog box.
Creating a Color Event
You can create a color event with the Choreography dialog box to
change the color of a product or resource.
-
In the Activities Process Tree, right-click a machining operation and select Choreography.
-
In the Choreography dialog box that appears, click
Create Color Event
 . .
-
In the Color Action dialog box that appears, edit the event name
in the Name section.
-
Select an object for the event in the tree or the work area.
-
Use the color wheel in the dialog box to set the color of the object you selected and
edit the transparency if required.
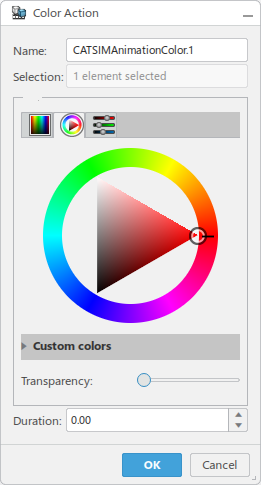 In the work area,
the object you selected is the color you specified in the dialog box. 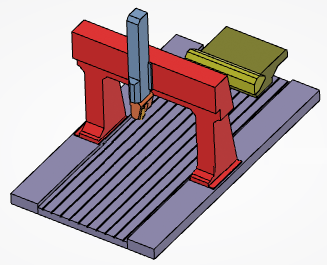 -
Edit the duration by entering a value or using the arrows in the
Duration section.
-
Click OK.
The Color Action dialog box closes and you can reopen it
to further edit the visibility event by double-clicking the event in the
Choreography dialog box. 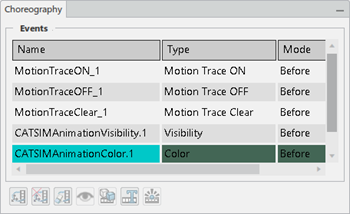
You have created a color event and it is listed in the
Choreography dialog box.
Creating a Text Event
You can create a text event with the Choreography dialog box to
display text in a dedicated panel for a specified time block.
-
In the Activities Process Tree, right-click a machining operation and select Choreography.
-
In the Choreography dialog box that appears, click
Create Text Event
 . .
-
In the Text Action dialog box that appears, edit the event name
in the Name section.
-
Edit the duration by entering a value in the Duration
section.
-
To create a new text panel, click the Create New option then
enter the name of the text panel in the box.
-
To add to an existing text panel, click the Add To Existing
option then choose an existing text panel from the menu beside the option.
-
Type the message for the text panel in the gray box, then edit the alignment, font,
and other attributes using the text editing tools in the dialog box.
-
To view a preview of the text panel, click Preview.
A preview text panel appears.  -
Close the preview panel to reopen the dialog box and continue editing the text panel,
or click OK to verify the event.
The Text Action dialog box closes and you can reopen it
to further edit the text event by double-clicking the event in the
Choreography dialog box. 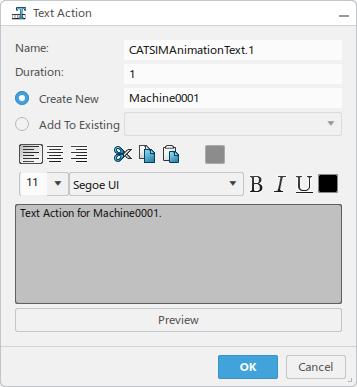 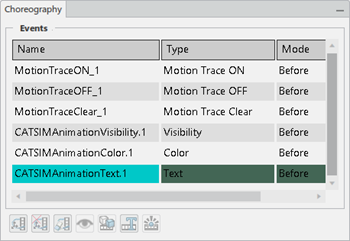
You have created a text event and it is listed in the
Choreography dialog box.
Creating a View Point Event
You can create a view point event with the Choreography dialog
box to define a series of view points for a specified time block.
-
In the Activities Process Tree, right-click a machining operation and select Choreography.
-
In the Choreography dialog box that appears, click
Create View Point Event
 . .
-
In the Viewpoint Action dialog box that appears, edit the event
name in the Name section.
-
Edit the duration by entering a value in the Duration
section.
-
To automatically insert a view point event, select the Automatic
insertion option.
-
To manually insert a view point event, click Insert
 . .
The viewpoint is added in the Viewpoint Step
Browser. 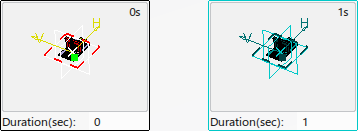 -
To modify the view point event, click Modify
 then edit the event. then edit the event.
-
To delete the view point event, click Delete
 . .
The view point is removed from the Viewpoint Step
Browser.
-
Click OK to verify the event.
The Viewpoint Action dialog box closes and you can reopen
it to further edit the viewpoint event by double-clicking the event in the
Choreography dialog box. 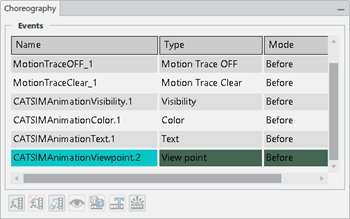 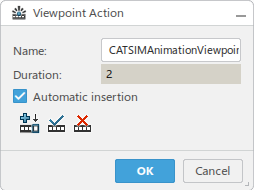
You have a created a view point event and it is listed in the
Choreography dialog box.
|

