Managing Material Removal Simulation Results

You can use Save Material Removal Simulation Result to save the result of a material removal simulation in database and recover the material removal simulation result when reopening your program. You can also create the material removal simulation result in a 3D Part.

Customizing options are available.

This task shows you how to:

Save the Material Removal Simulation Result of a Machining Operation

You can save the result of a material removal simulation of a machining operation in database.

By default, the result of a material removal simulation is saved in session only.

Before you begin:
  • Simulate the tool path with material removal.
  • To save the result of more than one machining operation, select the Multiple material removal simulation result on program check box in Me > Preferences > App Preferences > Simulation > Machining > NC Machining Apps Common Services > Material Removal.
  1. From the Activities Process Tree, select a machining operation.

  2. From the Analysis and Output section of the action bar, click Save Material Removal Simulation Result .
    A blue check icon appears on the machining operation to identify that the material removal simulation result of the operation is saved.

Notes:
  • The following message can appear when simulating a machining operation:
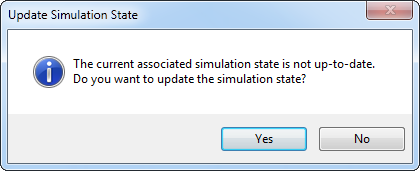
    • Click Yes to recompute the result of the material removal simulation.
    • Click No to simulate the machining operation with the previous computed stock.
  • To delete a material removal simulation result, right-click a machining operation and select Remove Material Removal Simulation Result.

Create Material Removal Simulation Result in a 3D Part

You can create a material removal simulation result in a 3D Part.

  1. Once a material removal simulation result has been associated to the machining operation, from the Setup section of the action bar, select Rough Stock .
  2. In the Rough Stock dialog box that appears, select Export Material Removal Result .
  3. Select the activity that contains the material removal result.
    By default, the Existing Part check box is selected.
  4. Select the destination of the material removal simulation result:
    1. Existing part: select a representation under an existing 3D Part and click OK.
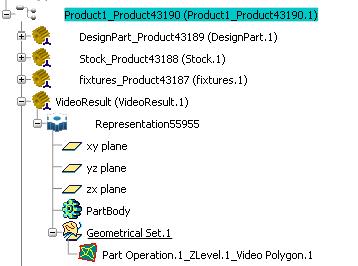
      The material removal simulation result is created as a polygon (mesh) under the selected 3D Part.

    2. Or select the New Part check box and select the product under which you want to create the 3D Part. Click OK.
      • A default name is proposed for the part (Video_Part Operation.1_xxx). It is editable.
      • The dialog box is updated with the name of the insertion product.
      • After OK, the 3D Part is created.
      • The material removal simulation result is created under the 3D Part, together with the three main planes and an axis system corresponding to the machining axis system of the original Part Operation.

You can now use the material removal simulation result of the original Part Operation (example, Part Operation.1) as the input stock for another Part Operation (example, Part Operation.2) in a new PPR Context.

Notes:
  • If the Part Operation.1 is modified, the material removal simulation result must be recomputed and saved again into the same 3D Part to be referenced automatically by the Part Operation.2. An update may be necessary.
  • The intermediate stock is not created in the 3D Part. If you need to create it, compute a material removal simulation result from the intermediate stock, associate the material removal simulation result to the machining operation and create the material removal simulation result in a 3D Part as explained above.