Interactions with Level Selector
-
In the Selection section of the Auxiliary
Viewer, click Level Selector
 .
The selection displays in the Information Card.
.
The selection displays in the Information Card. -
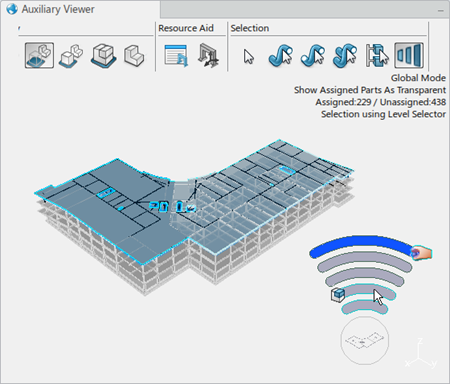
Click an object from the Auxiliary Viewer or the specification tree.
The level Selector is displayed in the right bottom corner of the Auxiliary Viewer.
-
Move the mouse over the Level Selector.
This displays different levels of the level selector as per the selected object.
The number of levels (semicircular arcs) seen in the level selector corresponds to the number of levels in the hierarchy of the selected object. This is until the root PPR object displays the UI activated objects in a dark blue color.
From the Auxiliary Viewer, select an unassigned part or a design product from the specification tree. In this case, the level selector shows the hierarchy along with the design product structure.
From the Auxiliary Viewer, select an assigned part or a Manufactured Item from the specification tree. In this case, the level selector shows the hierarchy along with the Manufactured Item structure.
-
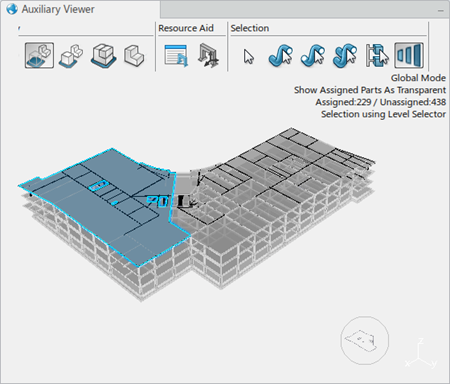
Move the mouse over a higher level in the level selector.
The first level of the level selector represents the selected object. The mouse can then move over a higher level in the level selector. In this case, the corresponding object in the hierarchy is displayed in the circular bubble and highlights on the specification tree and the viewer.