Creating a Customized Joint

The goal is to group segments on the upper body (including the spine and the head). This creates a new segment for the Postural Score analysis. This gives more flexibility with the created virtual segments of the pelvis, trunk, neck, and head. This is good for analyzing the posture of the trunk and editing the preferred angles with a score.

You can analyze the back load to prevent worker's injuries and to improve productivity in the manufacturing processes. There are many ways or systems for evaluating human postures. Basing the analysis of the trunk posture, for example, on the following bending angle.

You can create a recording during a simulation and exporting for analysis.

To do this, create virtual segments by selecting two manikin's segments. This segment has a calculated Range of Motion (ROM) based on the ROM of each segment of the pelvis, trunk, neck, and head. The central segments as we call them in the rest of this document included between the two selections. Creating these virtual segments for any degree of freedom (DOF). Then, you can specify standard Preferred Angles with a score and, by the same way, analyze the posture using the Postural Score.

  1. Click Customized Joint .
    The Customized Joints for Preferred Angles Dialog Box appears without any existing customized segment selected. So, you can either select an existing joint, or create the joint.

  2. Click New.
    The command prompt asks "Please select the first segment to which the joint will be attached".
  3. Select the required segment.
    The command prompt asks for a "Please select the second segment to which the joint will be attached".
  4. Select the required segment.
    The data appears in the dialog box, in our selection, Transpelvic/Lumbar2, and on the manikin.
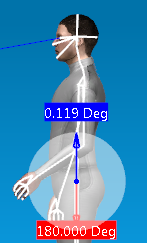
  5. Select Close or click the customized joint to activate the one you want to remove.
    This activates the Remove.
  6. Click Remove, and Close.