Importing a Robot Program | |||
| |||
-
From the Analysis & Output section of the action bar, click Import Robot
Program
 .
You are prompted to select a robot, task, or motion group.
.
You are prompted to select a robot, task, or motion group. -
Select a robot.
The Import Industrial Robot Program dialog box appears, and the Translator tab is selected.

If the translator for the robot is in the database, it is automatically selected.
 Note: If a translator for the selected robot is not in the database, you must first import it as described in Importing Ready-To-Use Robots Installed On Premises.
 - Optional:
Click Select Translator
 to
choose a different translator, if necessary.
to
choose a different translator, if necessary.
You may want to select a different translator to:
- Use a different version of the current translator
- Use the XML translator
- Use a customized translator before updating your settings to use the customized translator permanently
- Create or import a program for another robot manufacturer (useful when replacing a robot)
The Applicative Search bar is highlighted, allowing you to enter a search term for the desired translator.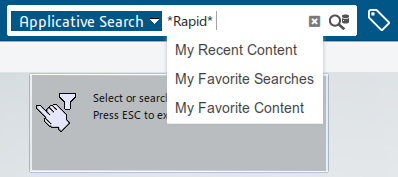
-
For some translators, an Options list also
appears that allows you to select a specific robot controller version:
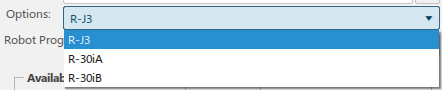
In some cases the translation can be modified based on the robot controller version used.
-
Robot Program Directory indicates the most
recent directory that a file has been uploaded from. Click to
select the directory to import robot programs from.
The selected directory is indicated.

Robot programs located in the selected directory appear in the Available Items list.
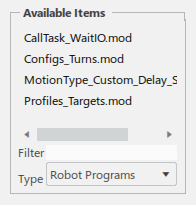
Filter allows you limit the programs shown in the Available Items list based on an entered pattern matching term.
-
From the Available Items list, select robot
programs to upload and click
 to move them to the Selected Items list.
Programs can be moved between Available Items and Selected Items with the following commands:
Moves selected items in the Available Items list to the Selected Items list. 
Moves all of the items in the Available Items list to the Selected Items list. 
Returns all of the items in the Selected Items list to the Available Items list. 
Moves selected items in the Selected Items list to the Available Items list. 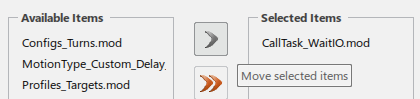
-
Click Next.
The Task Creation tab appears.
This tab provides the following options that determine how tasks are created for the selected robot programs.
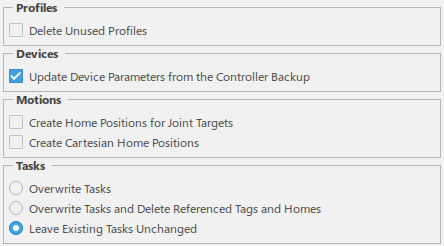
- In the Profiles section, Delete Unused Profiles deletes any profiles that are not used by existing or uploaded tasks, except those predefined on the resource reference.
- In the Devices section, when Update Device Parameters from the Controller Backup is selected, parameters of the device and controller are only updated when checked.
- In the Motions section,
- Selecting Create Home Positions for Joint Targets creates home positions for all joint target motions (instead of setting the joint values on the motion directly).
- Selecting Create Cartesian Home Positions results in all created and modified home positions being created as Cartesian homes, preserving the Cartesian position instead of the joint values when replacing a resource.
- The Tasks section allows you to
select one of the following behaviors regarding existing
tasks when new tasks are created during upload:
- Overwrite Tasks will overwrite existing tasks that have the same name as tasks that are created during upload.
- Overwrite Tasks and Delete Referenced Tags and Homes overwrites existing tasks and deletes the tags and home positions associated with those tasks as long as they are not used by other tasks or defined on the device reference.
- Leave Existing Tasks Unchanged leaves existing tasks intact. Any new tasks having the same name as an existing task are created with a different name.
-
Specify the behavior for any existing data and click
Next.
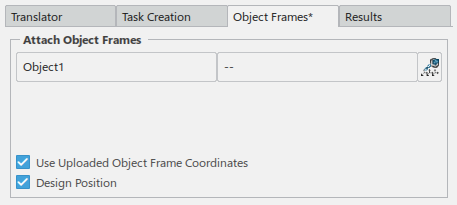
The Object Frames tab appears.
-
Click Attach Part
 and select a part in the work area.
The selected part is added to the Attach Object Frames list.
and select a part in the work area.
The selected part is added to the Attach Object Frames list.
If Use Uploaded Object Frame Coordinates is selected, the object frame position is set from the values from the uploaded robot programs. If it is not selected, the object frame coordinates imported are ignored. To upload all robot motion targets relative to a part, create the object frame at the part’s origin and clear this option.
When Design Position is selected, tags are created based on the nominal state of the selected part. If not selected, tags are created based on the current position of the product.
-
Make any selections for object frames, and click
Next.
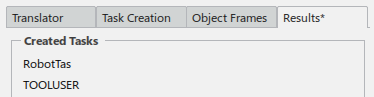
The Results tab appears and lists the tasks that were created.