Positioning the robot
You can automatically compute the possible locations for placing a robot.
-
In the Setup section of the action bar,
click Auto Place
 .
.
-
Select a robot, task, or tag group.
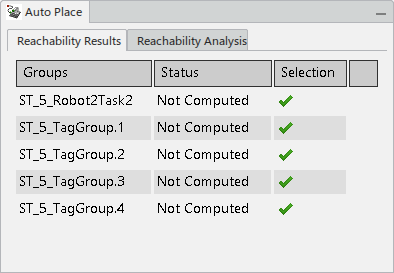
The Auto Place dialog box appears.
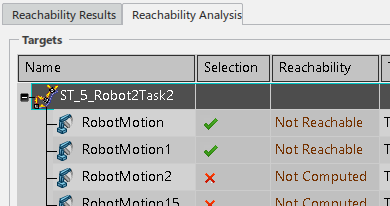
The Reachability Results tab lists all task and trajectories selected for analysis with a Status of Not Computed.
Select a robot task or trajectory in the Reachability Results tab and click the Reachability Analysis tab. An expanded view shows the attributes of the operations for the selected task or trajectory, each with a Reachability status of Not Computed.
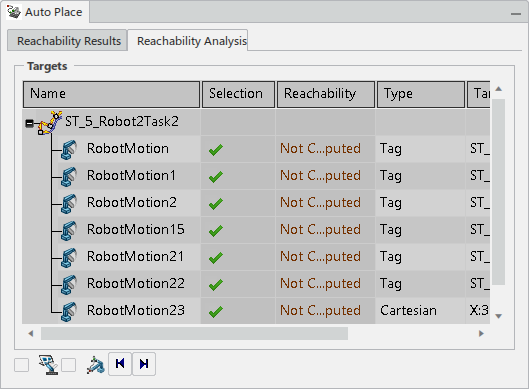
You can choose the targets to validate or ignore by clicking the cell in the Selection column to check or uncheck specific targets. By default, all targets are initially selected for reachability analysis.

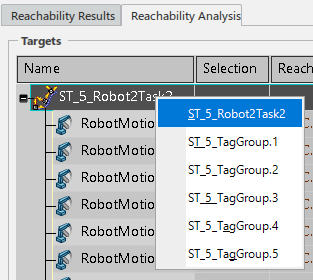
You can also right-click the task and select another task or trajectory to view.
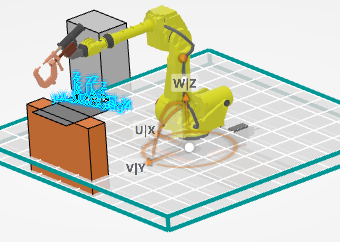
In the work area, a grid appears under the robot. The default grid is composed of a single layer and its dimensions are 3600 x 3600.

-
You can customize the grid in the following ways:
-
Select Define Grid
 in the context toolbar to open the Grid Definition panel and define the
Length, Width,
Height, as well as the number of cells
(X, Y) and layers
(Z).
in the context toolbar to open the Grid Definition panel and define the
Length, Width,
Height, as well as the number of cells
(X, Y) and layers
(Z).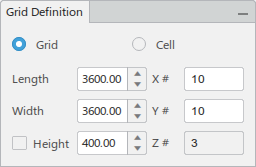
Once the grid is defined, select Define Grid
again to exit the
command. -
Use the orientation Robot snapped to the center of the grid to manipulate its position and orientation.
-
-
In the context toolbar, click Start
 to begin the
analysis.
When the analysis begins, the robot moves from one cell to another on the grid. For the selected groups of targets, the positioning analysis is performed for the robot and the status is appropriately updated in the grid. Each cell in the grid is colored according to its reachability status. A group is considered reachable only if all the targets in the group are reachable.
to begin the
analysis.
When the analysis begins, the robot moves from one cell to another on the grid. For the selected groups of targets, the positioning analysis is performed for the robot and the status is appropriately updated in the grid. Each cell in the grid is colored according to its reachability status. A group is considered reachable only if all the targets in the group are reachable.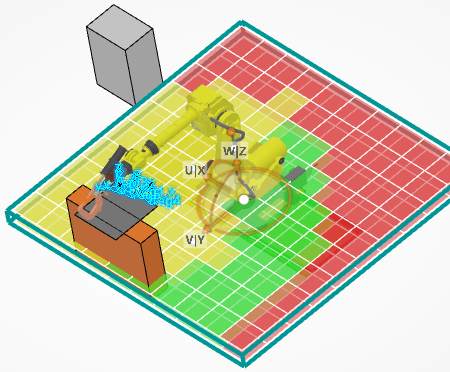
Colors indicating reachability status can be customized by selecting Settings
 in the context toolbar.
 You can change the default color for each status shown above by clicking the color swatch and selecting a new color and transparency level for each.

After analysis, the Status is updated to Reachable in the Reachability Results tab if all targets are reachable for the task, or Not Reachable if one or more targets are not reachable.

-
Select the analyzed task followed by the Reachability Analysis
tab to view the unreachable targets for that task.
-
Use the orientation Robot to manipulate the target to a reachable orientation.
From the Auto Place dialog box, you can launch Jog
 and check reachability by selecting Reach Disc
 .
. Open Jog Panel opens the Jog panel in the work area. Display Reach disc performs reach analysis and provides a visual indication of reachability for the TCP position. Green colored sections of the disc indicate reachable area, while yellow sections indicate positions that are out of reachability limits. 
Play Next moves to the next operation in the sequence. 
Play Previous moves to the previous operation in the sequence. -
When the target has been manipulated to a reachable position, click Update
Target
 in the
context toolbar to save the new position.
The Reachability status changes from Not Reachable to Reachable in the Reachability Analysis tab.
in the
context toolbar to save the new position.
The Reachability status changes from Not Reachable to Reachable in the Reachability Analysis tab. -
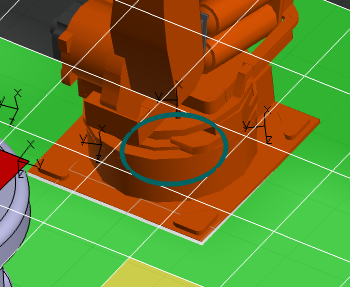
You can place the robot on any cell by clicking anywhere within the cell.
The robot moves to the center of the cell, and the cell is marked with a circle.
-
Once you have finished the analysis, you can select OK
 in the context toolbar to accept the current robot position and exit the command.
Note: You can select Exit
in the context toolbar to accept the current robot position and exit the command.
Note: You can select Exit to exit the
command without retaining any changes, and return the robot to its original
position.
to exit the
command without retaining any changes, and return the robot to its original
position.
 .
.