-
Right-click the section probe thumbnail, and select
Add to Scenario (2D Mode).
-
Simulate the scenario.
The animated movement of the parts as prescribed by the
simulation is visible both in the
work area
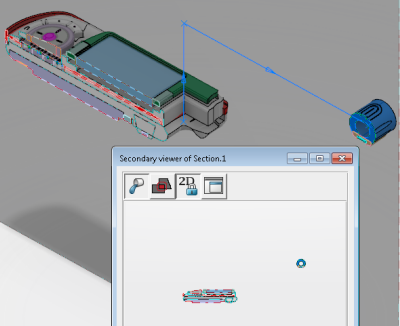
and in the 2D section viewer. The image above, for example, shows what the 2D
section looked like at the beginning of the simulation. The image below shows
what it looks like at the end.

You can modify the scenario or its constituent activities with the
window open.
Note:
As with the 3D view of the probe, the 2D view
remains available as long as it is part of the current scenario. Unlike the 3D
section probe view, the 2D view can be minimized because it is in a discrete
window. If you close the
Secondary Viewer of the Section panel while
the section probe is still part of the current scenario, the window temporarily
disappears. However, any changes to the probe, activities in the scenario, or
to the definition of the scenario itself trigger the window to appear. If you
want the window to remain dormant while it is part of the current scenario,
minimize it; do not close it.
-
Right-click the section probe and click the 3D view, so that you
can concentrate on the 2D view only.
-
If you want to follow the movement of the probe on an existing
track, in the panel, click
Excitations
 , right-click a track thumbnail, and select
Associate Section Probes.
-
Simulate the scenario again.
If you save the content in your manufacturing scenario, the state
of the probe in the scenario in which it is referenced can persist from one
3D Simulation
session to another.