Object Selection and Movement

You can choose among several tools to refine how you select and move objects.

Note: In this section, objects can refer to either products or resources. If the commands only affect resources, resource is used.

This page discusses:

Object Selection

By default, clicking the part of a resource with a mechanism selects the entire resource. Depending on other constraints, you may click a product or resource and select more than that resource or product.

When you select a part of a resource, such as a mechanism, you select the parent of the mechanism. For example, the robot as a whole is the parent of the mechanism, so selecting a part of the robot selects the whole robot.


If you select a resource for which you have created a Fix In Space constraint, you can select only the parent that contains the object, but not the resource itself.

This rule's purpose is to protect you from moving a resource within its parent context.


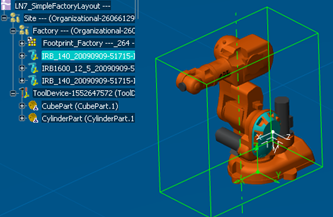
Selecting a product or resource highlights the object in the tree.

The selected object is the active object.

Move Objects with the Manipulation Handle

By default, a bounding box surrounds the active element. The box has a manipulation handle to move the active element.

When you select an object, if you have enabled Toggle Manipulation Handle Mode , 
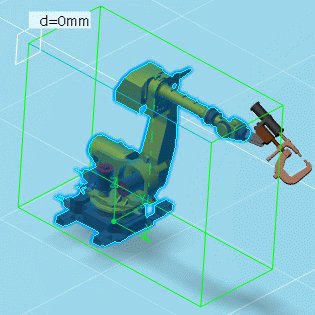
a bounding box appears, surrounding the object.

You can select and drag any edge of the box to move the object.

When you start to move an object with the manipulation handle, a linear ruler appears.


The ruler highlights the amount the object moves in a particular direction.

The XYZ axes manipulation handles created at the object origin also have linear rulers.

You can change the color of the manipulation handle by selecting another color in Me > Preferences > General > Display > Visualization > Global > Handle.

As its name implies, Toggle Manipulation Handle Mode is a toggle command.

When enabled (which it is, by default) the bounding box appears. When you disable the command, no bounding box appears.

Object Manipulation Settings

In 3D Simulation, you can set the step size for the snap mode.

Object Manipulation Settings enables you to set the step size for the snap modes.

The step size can be for linear movement or rotational movement.

Clicking the command opens the Object Manipulation Settings dialog box.

Whatever is entered in the Object Manipulation Settings dialog box persists until you modify it later.

The entries persist across sessions.

The Displacement step sets the size for linear movement; Rotation step sets the angular step size.

The Displacement step is used for accurate placement.

You can move an object only in multiples of the step value.

For example, if the displacement step value is 0.25 meters, you can move a resource any multiple of 0.25 (for example, 0.50, 0.75, or 1.00 meters), but not 0.33 meters.

The limit for minimal displacement is 0.2 mm.

Similarly, the rotation step enables you to make rotational movements more precise by allowing rotational movements that are multiples of the Rotation step value.

You can directly manipulate the objects using Snap Automatically on the selected object.

Snap Resources uses Rotation step.

Note: Object Manipulation Settings is available in 3D Simulation. If you use the manipulation handle to move objects outside of 3D Simulation, the movement snaps to the grid.

Move an Object Precisely in Snap Mode

You can move an object more precisely by snapping its movements to specified steps.

When you select Snap to Steps Off Last Position , the manipulation handle first shows the distance from the current position, which is 0.

When you move the object using any edge of the manipulation handle, the distance the object has moved appears in the label.


When you select Snap to Steps Off Current Axis , the manipulation handle first shows the distance from the current axis (also called the local origin of the world). When you move the object using any edge of the manipulation handle, the distance the object has moved appears in the label.