Comparing 3D Objects | ||||
| ||||
-
From the Markup section of the action bar, click 3D Compare
 .
.
-
To select the second object, use one of the following methods:
- Select an object directly in the 3D area or in the root list.
- Select a search result, and click Ok.
The comparison result is displayed. The geometries of the first part or product are displayed in red , those of the
second product or part are displayed in green
, those of the
second product or part are displayed in green  , and the common
geometries are displayed in gray
, and the common
geometries are displayed in gray  .
.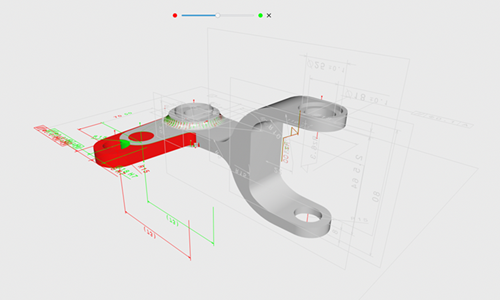
Note that the annotations created in 3D Tolerancing & Annotation are also visible in the compare result.
Tip: You can change the colors representing the two objects and the common geometry from the preferences. For more information, see Compare. - Optional:
Move the comparison slider at the top toward the left or the right, to control the
opacity of the first or second objects in the comparison result.
Notes:
- The opacity value of the slider is stored in the slide when you create it. After the slide is created, you can always move the comparison slider to change the opacity of the compared objects. This does not modify the opacity value stored in the slide.
- If subproduct or part positions are defined precisely according to the absolute axis system, clear the Local Axis option to ensure proper positionning in relation to the other compared object.
Table 1. Compare Results at the Extremities of the Slider Slider at Extreme Left Position Slider at Extreme Right Position 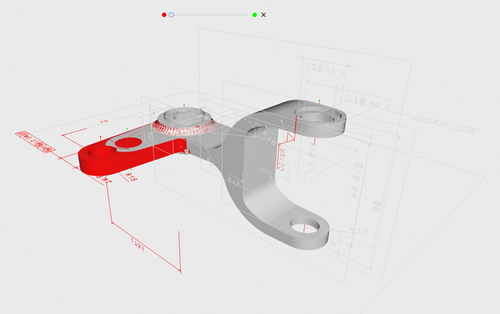
Only the first product or part in red
is
visible.
Only the second product or part in green
is
visible