A Semantic
> Resources interface is available in the
Business Console to easily configure
your ontology needs. You can define, amongst others, ontology/thesaurus resources for the search application without impacting the search service.
Create ontology resources before editing them in the
Business Console
Before you begin:
This procedure explains how the
Exalead CloudView administrator
creates ontology resources in the Administration Console
so that they can be edited in the
Business Console.
Go to Index > Data Processing > Semantic Processors.
Drag the Ontology Matcher processor to the list of current processors, and expand its configuration panel.
Click Create new next to Resource directory.
Enter the name of your ontology resource, for example, myonto.
Click Save and Apply.
Your new ontology resource shall now be available in the
Business Console, under Semantic
> Resources.
Configure ontology annotations
The Ontology Matcher detects expressions (or text forms) in a token stream. It tags these expressions with an annotation name that
can then be mapped to a category field or an index field. Ontologies are made of annotations, where each annotation can contain sub-annotations
and/or multiple display forms.
Add a new annotation package
Before you begin: You must first create an annotation package for the user query.
In Semantic > Resources, select an ontology resource from the list of Resources.
If the semantic resource is not available in the list, click on the Refresh button.
If the semantic resource is in the list but you get an error message, check with your
Exalead CloudView
Administrator. When a new resource is created, the changes must be applied to the configuration before being able to edit the resource.
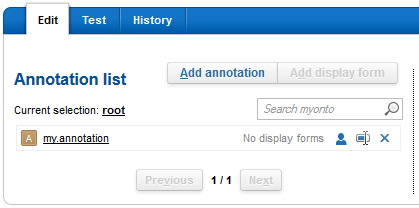
To create an annotation, click Add annotation, and enter a name, for example, my.annotation
Add a display form to an annotation
In the Annotation list, select an annotation or sub-annotation.
Click Add display form and configure the following.
In Value, enter the display name that should be returned when a matching textual form is found in a document.
For example, enter Coca-Cola
In Language, restrict the match to a specific
language or accept xx (N/A) (for
all languages).
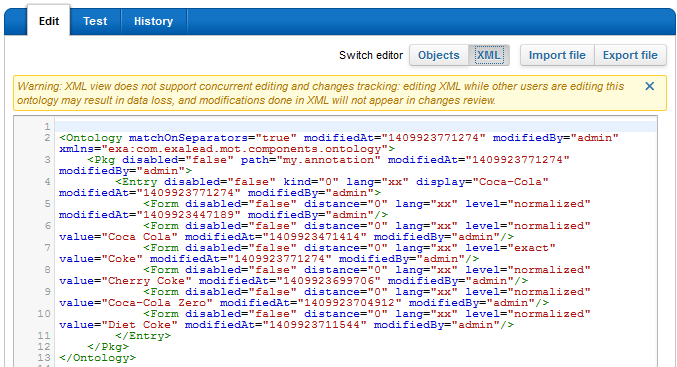
The display form can be configured either directly in xml, by switching to the XML editor (see
the example in Figure 2 ) or using the interface with the
Objects editor as follows:
In Match text form, enter the text to match with the display form, for example, Coca Cola
(without hyphen).
In Normalize, select how to normalize text forms: No (exact match), As lowercase, As lowercase and remove accents,
etc.
In Language, you can either restrict the match to a specific language or accept
xx (All languages).
Note:
To quickly add similar new text forms, click Add text form.
In this example, we want to link different text forms of Coca-Cola to the Coca-Cola display form in our my.annotation
annotation, and we create forms for each of them. Same ontology resource example in XML editor
You can test your resource changes.
Test a resource
You can test your ontology resources to see the annotations it creates on tokens (words, punctuation marks, etc.) or documents.
Go to the Test tab and select:
An analysis pipeline configuration where the ontology matcher resource appears.
The Ontology matcher processor and its resource versions
(if several versions have been saved).
The Language to match.
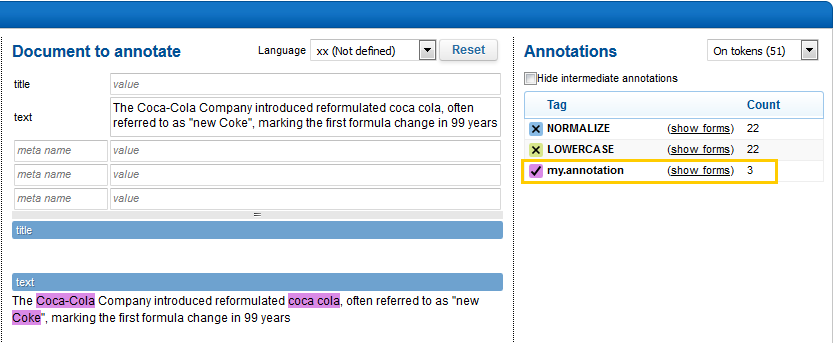
Type or paste text in the Annotate a text sample box.
The annotated text displays below the box and the Annotations panel on the right displays its tags and associated forms.
In our example, Coca-Cola, Coca Cola and Coke are highlighed and we can see that they produce the
my.annotation annotation with the Coca-Cola display form as required.
Note:
You can select Hide intermediate annotations to focus only on the most important annotations.
If you are satisfied with the test then you are ready to publish.
Keep annotations with the highest trust level only
An annotation can be generated several times for the same text form, when you declare the same text form with different normalization
levels.
The word whatever will match both forms and therefore generate the annotation entry twice.
This also means that when mapped to a category, it will increase the count more than once which has no interest as we don't want to use category counts
for ranking and only want each document to be counted once.
Open your <DATADIR>/config/Analysis.xml file.
In the <OntologyMatcher> node, set the trustLevelBasedDedup attribute to ”true”,
as shown in the following example.
Then, in the
Business Console, edit your ontology resource with the XML editor to specify the required
trust levels for each <Form> node using the distance="n" attribute.
The distance formula is actually “distance=100 - n”, so to get the highest score, set the distance value to 0, and to get the lowest score,
set it to 100.
For our example, to keep only the annotation generated for the “normalized” level, you could have: