Add a Spellcheck Allow List Manually
Before you begin: To define a spellcheck allow list, you must first have enabled a dictionary with a
spellcheck allow list in the Administration Console. See Setting Up Spell-Check in the Exalead CloudView Configuration
Guide.
-
In Semantic > Resources, select a spellcheck allow list resource from the list of Resources.
For example, a Spellcheck - allow list.
- If the semantic resource is not available in the list, click the Refresh button.
- If the semantic resource is in the list but you get an error message, check with your Exalead CloudView Administrator. When a new resource is created, the changes must be applied to the configuration before being able to edit the resource.
-
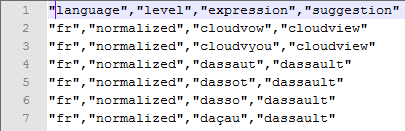
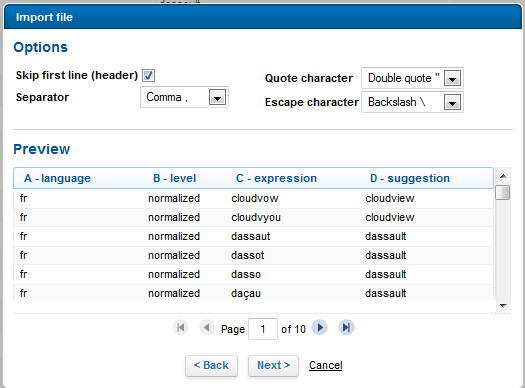
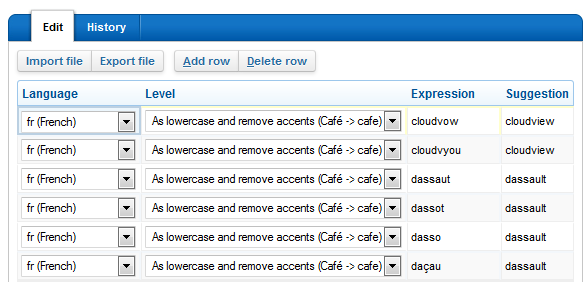
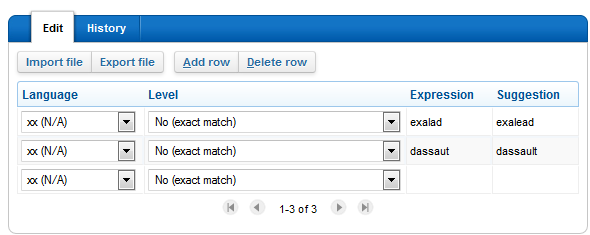
To configure the allow list resource, click Add row for each
entry and in:
- Language, restrict the match to a specific language or accept xx (N/A) (for all languages).
- Level, select the matching level, for example, No (exact match).
- Expression, type the word to allow list, for example, exalad.
-
Suggestion, type the suggestion to correct the misspelled
expression, for example, exalead.
-
You can now either:
- (optional) submit the resource for approval; see Submit for validation
- validate the changes; see Review a single resource