Configure the Source Connector
You first have to configure a source connector to fetch, prepare, and push
documents to the Proxem API.
Note:
As the Proxem analysis can take time, you can optionally push documents directly to a
Consolidation Server to get a quicker access to documents. For more information, see Configure the Consolidation Server.
-
Open the
Exalead CloudView
Administration Console.
-
Add a connector instance:
-
Go to
Connectors and click
Add connector.
-
For Name, enter a descriptive name for the connector, for
example, filesToProxem.
-
In
Creation mode, select either
new or
copy if you want to copy an existing
connector.
-
In the Type list, select a source connector like
Files.
-
Click
Accept.
-
Configure the source connector. For example, for a Files connector, you have to
define the paths to crawl in the Configuration tab.
-
Go to the Advanced tab.
-
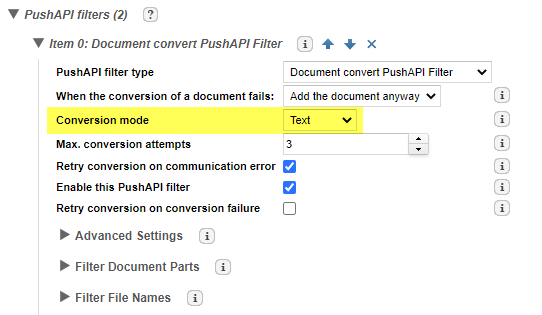
Add a Document convert PushAPI Filter.

-
Add a Push to Proxem PushAPI filter.

| Property |
Description |
| Proxem project ID
|
ID of the Proxem project for which you want to index
documents. |
| Proxem user name
|
User name to connect to the Proxem server. |
| Proxem API key
|
Specify the key of the Proxem external API. |
-
Click Apply.
For the standard workflow, you can now discard source connector documents to make sure that Exalead CloudView does not index them.
Discard Source Connector Documents
You can discard documents coming from the source connector to avoid indexing and
seeing them in the Exalead CloudView interface.
You do not want to search on these documents but only on the documents analyzed by Proxem.
-
Go to Data Processing and open your Analysis pipeline, for
example,
ap0.
-
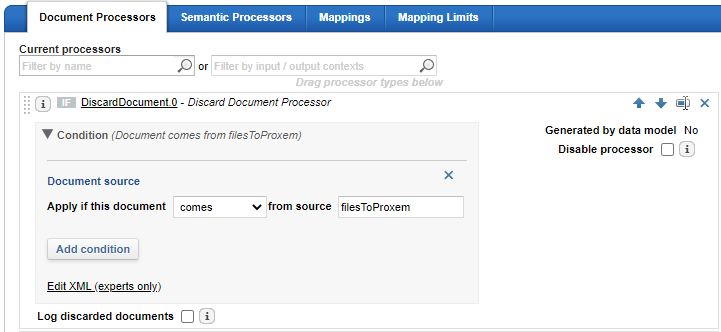
In the Document Processors tab, add a Discard
Document Processor at the top of the Current
processors list.
-
Expand Condition tab, and configure for documents coming from
the source connector (for example,
filesToProxem).

-
Click Apply.
-
Go to the Home page and click Scan for
the source connector.
You can now configure the Proxem connector.
Configure the Proxem Connector
You can now configure a Proxem connector to index the documents analyzed by the
Proxem API.
-
Open the Exalead CloudView
Administration Console.
-
Add a connector instance:
-
Go to Connectors and click Add
connector.
-
For Name, enter a descriptive name for the connector, for
example, proxem.
-
In Creation mode, select either new
or copy if you want to copy an existing connector.
-
In the Type list, select Proxem.
-
Click Accept.
-
In the Configuration tab, configure your Proxem connector as
required.
| Property |
Description |
| Proxem base url
|
URL of the Proxem environment. It must point to the API. For
example, https://studio3.proxem.com/production4d/api/v1 |
| Proxem project ID
|
ID of the Proxem project for which you want to index documents. |
| Proxem user name
|
User name to connect to the Proxem server. |
| Proxem API key
|
Specify the key of the Proxem external API. |
| Source connector name
|
Specify the name of the source connector that fetches
documents to push them into the Proxem connector. |
-
Go to the Operation tab and schedule a full scan every 5
minutes.
Note:
This step is to make sure that the connector has up-to-date annotations.
-
Click Apply.
-
Go to the Home page, and click Scan for
the Proxem connector.
Documents will be indexed only after the first Proxem analysis. This can take time.
You can now configure the Index Data Model. For more information, see Configure the Exalead CloudView Data Model.
Configure the Exalead CloudView Data Model
You can now configure the Exalead CloudView data model to create the categories generated by Proxem.
Before you begin: See your Proxem Explore interface, to find the categories that you want to retrieve.
-
In the Administration Console, go to Index > Data Model.
-
Under Data model options, select Trace all
metas
-
Click Apply.
-
Go to the Home page, click Scan for the
connector.
This saves all scanned metas to an internal database.
-
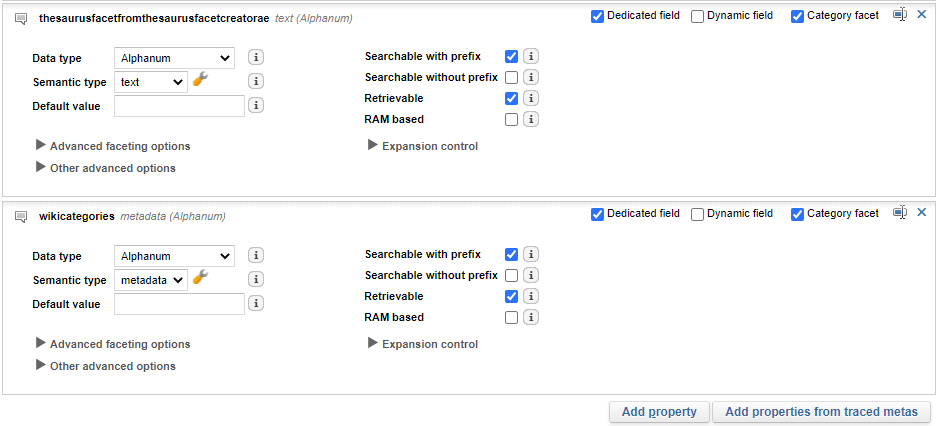
Go back to Index > Data Model > Classes, click
Add properties from traced metas.
Exalead CloudView enables you to select multiple metas to save as properties.
-
Select the Proxem categories (their technical names) that you want to index, and in
their property configuration, select Category facet.

-
Click Generate properties.
-
Click Apply.
-
As you have changed the Index Schema by adding new properties, you need to clear the
documents in the build group and reindex your data:
-
On the Home page, under Indexing,
click Clear. Wait for the index to clear its documents.
-
Under Connectors, click Scan for
your Proxem connector.
You can now test your Search Application. For more information, see Test Results in the Search Application.
Configure the Consolidation Server
Optionally, you can configure Exalead CloudView to use a Consolidation Server, that will receive documents directly from the Source
Connector, and then from the Proxem Connector when the Proxem analysis is complete.
This is useful to save time and avoid waiting for the end of the analysis.
-
Prepare both the Source Connector and the Proxem Connector to use the Consolidation
Server:
-
Open the connector, and go to the Deployment tab.
-
For Push to PAPI server, select the Consolidation Server
instance on which the connector must push its documents.
-
Apply the configuration.
-
Disable the Discard Document Processor configured in Discard Source Connector Documents.
-
Go to Data Processing and open your Analysis pipeline, for
example,
ap0.
-
In the Document Processors tab, for the Discard
Document Processor, select Disable processor.
-
Click Apply.
-
Configure the Consolidation Server.
-
Go to Index > Consolidation.
-
Under Aggregation Processors, click Add
processor.
-
Select
com.dassault_systemes.exalead.processor.proxem.ProxemAggregationProcessor
("Proxem Aggregation Processor")
-
Click Apply.
-
Rescan the impacted sources using the Consolidation Server:
-
Go to the Home page.
-
Under Indexing, click Clear to
clear the index (as you have changed the Push to PAPI server
property from a build group configuration to a Consolidation Server configuration).
-
Scan your connectors.
You can now test your Search Application. For more information, see Test Results in the Search Application.
Test Results in the Search Application
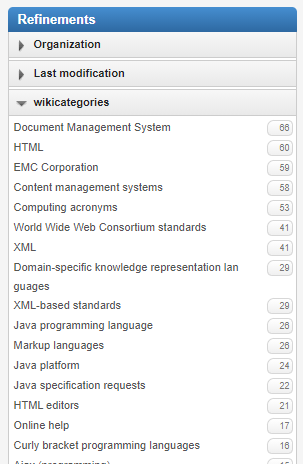
You can now use the Proxem categories in your Search
interface.

|


