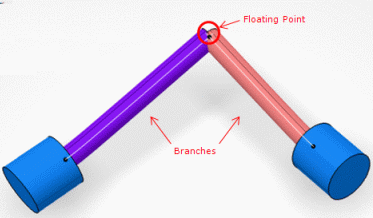
-
Open a product with a floating point (3D point) and two branches connected through the
floating point.

-
Select the floating point and the two branches.
-
From the Branch section of the action bar, click Floating Point
 to choose how
the 3D coordinates of the floating point will be recomputed: using
Ratio or Length.. to choose how
the 3D coordinates of the floating point will be recomputed: using
Ratio or Length..
The Select mode dialog box
appears.
- Select the mode:
- Ratio and click OK. With this mode, the
position of the floating point is repositioned using its previous position on the
selected branches (route points). The floating point is changed into a 3D Point
Coordinate.

- Length and click OK. With this mode, the
length of the original curve is chosen.

Note:
The selected branches can
be in two different electrical branch geometries. After executing the command, all the
specifications of the branches are kept (tangents, profiles, …), only the position of
the point is modified.
-
Edit
the floating point.
|