-
From the Compass, click 3D Modeling
Apps
and select
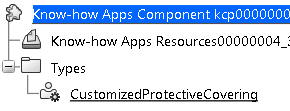
Know-how Apps Components to create an applicative component.
The Know-how Apps Component dialog box appears. -
Enter a name and click OK.
-
From the Types and processes action bar, click
Create Type
 . .
The Create Type dialog box appears.
- Select a Father type:
- Click Launch types browser.
- In the Types browser, select InternalAdaptiveProtection, and then click OK.
-
In the Type name box,
enter a name for the object, for example
CustomizedProtectiveCovering, and then click OK.
The technological type appears under the Types node in the tree.  -
In the tree, select the
CustomizedProtectiveCovering type, and then click
Add Attribute  . .
The
Create or modify attribute
dialog box appears.
- Define the attribute to be added to the selected type:
- In the
Name
box, enter
MaxBendRadius. - Under Parameter, select the Length type.
- In the Value box, define a length (For example: 7mm).
- Click OK.
The attribute appears in the Local attributes list. - Select .
- From the Compass, click Social and Collaborative
Apps
and select Data Setup to create a resource set containing the created technological type.
- Right-click the Electrical feature customization resource, select Create a new resource table, and then click OK.
- Assign the customized type to the resource set:
- In the Resource Set window, double-click the Resource cell to browse for the applicative component.
The Select a Know-how Apps Component for item 'Electrical customizable features' dialog box appears. - In the From Session tab, click Retrieve Loaded Objects, and then select the component you created.
- Click OK.
- In the Resource Set window, click OK to assign the type to the resource set.
- Optional: Associate the resource set to a collaborative space
and click Save.
- In the Electrical 3D Part Design app, activate an electrical branch geometry.
- From the Protection section of the action bar, click Protective Covering
 . .The Instantiate Protective Covering dialog box appears. - Customize a protective covering with the type you created:
- Select the From scratch selection mode.
- Under Customized Protection Type Selection, click Protection Type to select in a browser the type you previously created.
Note:
You can assign only one type per protective covering but you can change it if several types are available by clicking Protection Type again.
- In the 3D area, select a branch, and then click OK in the dialog box to validate.
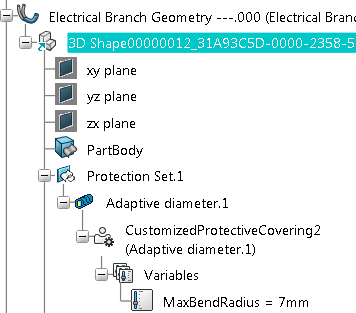
The protective covering is typed. Its attributes appear under the Protection Set node in the tree.
 - Optional: To remove a customized type or to add a different customized type, do either of the following:
- In the Instantiate Protective Covering dialog box, right-click the customized type and select Reset Type.
- In the tree, right-click the customized type and select Delete.
Notes:
- You can filter the displayed parameters or variables using .
- The last used type is always preset in the dialog box when you want to customize a new protective covering.
|

