Exploring Relationships Between Objects

The Relations command displays the ecosystem of related objects by navigating on relationships and paths.

  1. Select an object in a product structure and, from the Tools section of the action bar, click Relations .

    Tip: To open Relations, you can also do the following:
    • From a search result, right-click an object and select Relations.
    • In a web-in-win component, from the search bar menu, select Relations.

    The immediate ecosystem of the selected object appears.
    Notes:
    • The access from the search bar menu is not available if an authoring app is running in the background.
    • In native app, to drag and object from the Search result and drop it in the Relations panel, you must undock the Relations panel.
    • If Relations is started without a selection, then a Quick Access section appears that enables you to select objects you have used before:
      • Recent: a list of the last 10 objects with which you have started the Relations
      • Favorites: a list of favorites that you have created. For a selected favorite, the saved network of the related objects is recomputed.
        Note: A favorite is created when you click Favorite in the toolbar. It saves the network of related objects and the current Relations set.


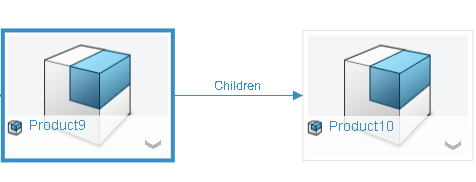
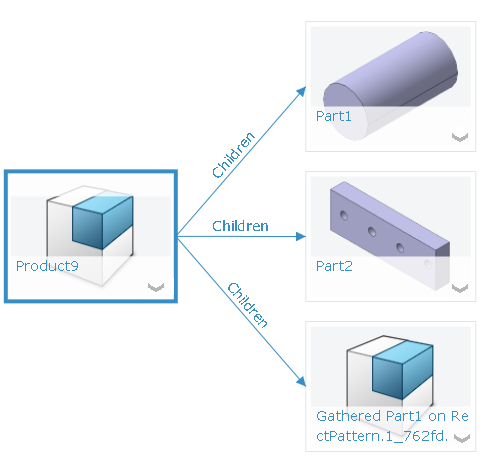
  2. Double-click the numbered box representing children. If there are more than 10 children, drag the children one-by-one from the Information panel to add them, or use the Preview Group panel.
    The object's immediate ecosystem is added to the graph.


  3. Select another object.
    That object's immediate ecosystem is displayed in the graph.


    Notes:
    • When you select an object, the objects connected to it from a related objects point of view are displayed. Until you select an object, the relations on that object are not computed nor displayed. Therefore, some links can exist but are not displayed.
    • When new objects appear in the ecosystem of the selected object, they can be automatically reconnected to others objects, as an object always appears only once in the graph. This happens anytime an object is connected to several other objects in the graph.
    • If an object in the graph has attached instances, then you can see below the object. Click to display the instances, or click , then Customize Display Options , then Show instances .
  4. To compute paths in the graph between objects, click Find Paths .
    1. Select a start object (start point).
    2. Select one or more stop objects (end points).
    Note: Depending on the section of the Find Paths panel, the paths behave as follows:
    Criteria All paths from current network section All structure paths section
    Computation The paths are computed based on all loaded relations in the graph. The paths are computed from the index between the start and stop objects.
    Start and stop order The paths are computed in both directions. Therefore the order of the start and stop objects is not relevant. If you select a leaf as start and a root as stop, no paths are found.
    View Only the tile is displayed. A tree branch is also displayed under the tile view, so you can see the detail of all objects individually.
    Drag and drop behavior With drag and drop, this path behaves as a if selecting all objects in the path. If you drag this path, it behaves as a structure path. Depending on the target app, either the whole path is taken into account, or only the leaf (stop). You can also select an Advanced filter as a start. In this case, the computed paths match the filter specification.

Important: If the Relations command is launched again, the content of the Relations is entirely replaced by the newly selected object and its related objects. You cannot go back to the previous state of the graph. However, it is possible to pin the Relations in the dashboard by clicking . The next time you click theRelations command, a new Relations app opens with expected content. It is not opened in maximized state.
Tips:
  • To manually customize selected relations instead of using the automatic selection of navigated relations, click Customize Relations .
    • To search for a relation type, click Search .
    • To select a set of relations, click Relations Set and select accordingly.
    • To select all relations or to cancel the selection of all relations, click Select All .
  • To customize display options, in the widget toolbar, click Customize Display Options .
    • Activate/deactivate Display nodes with 2D Thumbnails.
    • Activate/deactivate Recompute layout on-the-fly. The layout is computed in one shot when several objects are added at the same time in the graph to maximize the number of arrows going from left to right.
  • Click Layout Mode to modify the position of a node within its column using drag and drop.
    • It is not possible to move a node from one column to another.
    • It is not possible to move several nodes at the same time.
    • Refresh and Customize keep customized layout positions.
    • Print command takes into account the customized layout positions.
    • When the customization leads to objects that are not connected with any links, they are removed from the graph. If all objects are disconnected after customize, then only the start point remains as the only object of the graph.
    • Customized layouts are not available when the Search command is active.
  • For the Search in Current Dashboard, when multiple objects match the search criterion, then a selection navigator appears at the top of the viewer. It enables you to navigate from one matching object to the next. All objects that do not match the search criterion are grayed.
  • For the 6WTags and Search in current dashboard commands, to remove grayed objects, in the widget toolbar, click and select an option from the displayed list:
    • Remove objects selected
    • Remove objects not selected
    • Remove objects filtered.
  • Loops detection using 6WTags
    • The Loops rule in the 6WTags provides two tags: IN (green shading) and OUT (red shading).
    • These are not pre-computed therefore a count is never displayed.
  • To display an object's properties, click Information and select objects.
Notes:
  • The navigation relies on an index and thus is subject to index latency. Once the relations of an object have been retrieved from the index, they are not refreshed again unless you click Refresh.
  • The Refresh command is also subject to index latency, so if a modification is done in the database, the Refresh command shows it only after the next indexation.
  • In native apps:
    • Only one Relations window can be opened at a time.
    • Drag and drop outside Relations is only managed in a navigation experience.
  • It is not possible to drag & drop a path on an existing root or to explore several paths under the same root. Each path dragged and dropped in a navigation experience (in empty space) adds a new root in the navigation experience.