Run a Simulation with Dynamic Clash On
You can use dynamic clash in On mode, which lets
the simulation continue when a clash is found, but the data in clash is
highlighted.
This behavior is the same in simulations and during layout movements (for
example, when snapping the Robot to a part and moving it around).
-
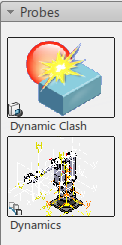
In the Probes
 panel, right-click the
Dynamic Clash thumbnail, and select
Clash Detection On. panel, right-click the
Dynamic Clash thumbnail, and select
Clash Detection On.
-
From the work area, select a track.
-
Click
Play on the
Compass.
The experience starts.
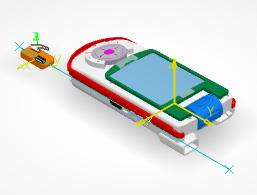
- When the two parts clash, they change color, and the experience continues.
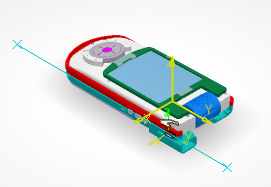
- When there is no clash, the display changes again.
Run a Simulation with Dynamic Clash Stop
This procedure describes how to use Clash Detection during a
simulation.
Note:
When you perform dynamic clash (for example, when snapping the Robot to a part and moving it around), a moving part stops as soon as the
system identifies a clash. It starts moving again once you move the parts to
clear the clash. Depending on how fast you move the part, the moving part
may stop moving before it gets in clash, which leaves a gap between the two
parts. This occurs because the system computes the clash discretely at the
pace you move the part. You can move the part slowly toward the stationary
parts to overcome the gap.
-
In the Probes
 panel, right-click in the
Dynamic Clash thumbnail, and select
Clash Detection Stop. panel, right-click in the
Dynamic Clash thumbnail, and select
Clash Detection Stop.
-
From the work area, select a track.
- Click Play on the Compass.
The experience starts. When the two parts
clash, they change color, and the experience stops. 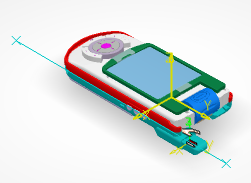
- Click Resume
 to continue stepping through the experience. to continue stepping through the experience.Once the clash is cleared, the experience continues. - Click Play again to deactivate this function.
Edit Clash Detection
This procedure describes how to use Dynamic Clash
edition during a simulation.
-
In the Probes
 panel, right-click in the
Dynamic Clash thumbnail, and select
Edit Clash Detection. panel, right-click in the
Dynamic Clash thumbnail, and select
Edit Clash Detection.
The Dynamic Clash edition dialog
displays.
-
Edit the Clearance value.
- Optional:
Check the Activate resource clearances
option.
When this option is cleared, the global clearance value, if
defined, applies to all items.
When this option is selected, the resource clearance values
defined in the Preferences'
Clearance rules table apply to
the applicable items, while the global clearance value
applies to items that are not covered by the resource
clearances table.
- Optional:
Check the Activate point cloud clash support
option.
- Optional:
Edit the Exclusion list.
Notes:
- Exclusion list allows you
to identify objects to exclude from collision
detection. You can add or remove objects from the
list. The listed objects are ignored.
- It also allows you to
identify objects to exclude when using the
following capabilities in:
- Assembly Evaluation
-
- Track simulation
- Track authoring
- Assembly Path Optimization
-
- Track simulation
- Track authoring
- Computation of Global Minimum
Distance Label

- Computation of Minimum Distance
Label (using Track Collections)

- Path Planing

- Track Plot

- Track Analysis
Assistant

- Track Simulation Analysis File
Export

- If all moving objects are
in the Exclusion list, the
expected behaviors are as follows:
- In the case of a Track simulation and a Track
authoring, there is no clash detected with Dynamic
Clash.
- In the case of Minimum Distance
Label, the labels are not
displayed
- In the case of Path
Planing, the command does not start.
- In the case of Track
Plot, the distance curve is a
horizontal line at zero millimeters.
- In the case of Track Analysis
Assistant, the 3D viewer and the list
are empty.
- In the case of a Track Simulation
Analysis File Export, there is no file
created.
You can add a child of a Track moving
object in the Exclusion list.
In this case, this information is taken into
account and the child object is ignored during
clash or distance computation. Clash can still be
found with other children objects.
- Select one or several objects, then click
Clear exclusion list to
clear the Exclusion
List.
- You can update, that is, add or remove an object
in the Exclusion List while a
command is active. The changes are automatically
taken into account for Dynamic Clash.
The same behavior applies to
the following commands when the Edit
Clash Detection panel is closed:
- Minimum Distance Label
 / / 
- Path Planing

- Track Plot

- Track Analysis
Assistant

This means that
after closing the panel, interference detection,
clash status, penetration or distance values,
involved products, and label positions are updated
according to the new excluded objects
list.
- The Exclusion List is not
persisted in the database: it is kept while the
Simulation is opened in your 3DEXPERIENCE session.
|
