Creating a Simulation State

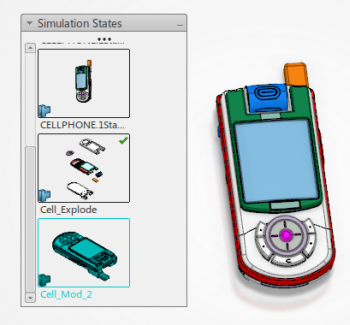
You can take snapshots of the states of each object within a simulation; these snapshots are called simulation states.

This task shows you how to:


Before you begin: This scenario assumes that you have already activated 3D Simulation.

Create a New Simulation State

You can create a new simulation state. To use a state in a simulation, make it part of the active scenario.

Before you begin: This scenario assumes that you have already activated 3D Simulation.
  1. Click New Simulation State .

    A thumbnail image of the new state appears in the Simulation States panel, and the State Management panel and the BI Essentials Definition appears. For more information, see State Management Panel and State Comparisons.


  2. For a state defined for a resource that owns a task (or defined for the parents of the resource), right-click the thumbnail, and select Link 3D State to Task. Then select a task.
    The state associated with the task is applied at the beginning of the task simulation.
  3. Modify the color and then save the state and turn off the command.
    The state reverts to what it was before the New Simulation State command being used.
    Note: Simulation states only store attributes of products and resources. They do not store attributes of 3D shapes.

Specify the Active Simulation State

You can select a simulation state and specify that state as active. The scenario only uses active states.

In the Simulation States panel, right-click the thumbnail of the simulation state and select Set As Active.
The check mark appears in the selected thumbnail to indicate that it is the active state.
Update a Simulation State

You can update a state to apply to that state the changes you have made in the work area. Also, any additions of products or resources that have added to the process or resource structure whose state is saved are taken into account when the state is updated.

  1. In the Simulation States panel, right-click the thumbnail of the simulation state to update and select Update State.
    The BI Essentials Preview appears. The thumbnail for the selected state reflects the update.
  2. Select a product or resource that is not part of the state.
    A context panel appears.
  3. Click Add to State.
    The Log field in the Object List of the State Management panel is updated. The Robot snaps to the object so that you can modify its position.
    Notes:

    Depending on the type of object you select, a data-specific editor may open. For example, for a robot, the Jog command starts.

    You can multiselect objects. Changes you make to the state, such as to the transparency, are applied to all objects.

  4. Click Load Attributes From... .
    The Simulation State panels appear. A thumbnail labeled Session State appears next to the Nominal State. The Session State contains the attributes of the scenario before the state was created. You can import its attributes into the modified state. Similarly, you can apply the attributes of the Nominal State by importing the attributes.
  5. Select the state with the attributes you want and confirm that you want the state modified.
    The state is modified.

Apply a Simulation State

You can apply a state so that the work area reflects the selected state.

In the Simulation States panel, right-click the thumbnail of the simulation state that you want to apply to the 3D and select Apply State.


The 3D reflects the selected state.

Recapture a State

You can quickly recapture the a state’s information by updating the attributes for the objects with the current values from the session and by adding newly modified objects to the state.

In the Simulation States panel, right-click the thumbnail of the simulation state and select Recapture.
The command changes the attributes for objects that are already in the state so that the attributes reflect what changed during the session. In addition, the attributes of newly modified objects are also added to the state.