Using the Spreadsheet

You can use the spreadsheet to browse and edit planning and simulation data.

This task shows you how to:


Before you begin:
  1. Open a PPR Context or a Simulation Object.
  2. To open the spreadsheet panel, select a root node and click PPR Spreadsheet from the Simulation section of the action bar.
Tips:
  • To make the spreadsheet dialog boxes floatable, click Show Preferences and check the Show Managers as Floatable option.
  • To reorganize the structure according to attribute groups, switch to the flat display mode by clicking Flat mode.

Manage Object Attributes

You can hide or show, reorder, and edit attributes.

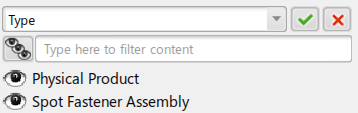
  1. In the spreadsheet, click Attributes Manager .
    The list of available attributes appears, in the order of the spreadsheet.
  2. To manage attributes display, use the following commands:
    CommandDescription

    Hides or shows all attributes.

    /

    Hides or shows a single attribute.

    /

    Moves the selected attribute up or down the list.

  3. To edit an attribute, select its value in the spreadsheet and enter a new one.

Tips:
  • Nonevaluated mandatory attributes are signaled by a highlight icon in their cell and header.
  • You can check, filter, and export attribute validation messages in the Report Manager. Click Report Manager to start the Report Manager.
  • You can use the PPRSpreadsheetAttributeValidation_ID and PPRSpreadsheetAttributeValuePropagation_ID business logics to test attribute values and generate messages based on defined rules.

Filter Objects

You can filter objects based on attribute values.

  1. In the spreadsheet, select an attribute then click Filters Manager .
    The list of available values for the attribute appears.
  2. To filter values of the attribute, use the following commands:
    CommandDescription

    Hides or shows all attribute values.

    /

    Hides or shows a single attribute value.

Group Objects

You can create grouping nodes to group objects based on attribute values. This enables you to select and edit all objects in a group simultaneously.

The scenario below illustrates how to group objects by type.

  1. In the spreadsheet, click Groups Manager .
  2. Click Create Group .
  3. From the list, select an attribute such as Type.
    The list of available values for the attribute appears.

  4. Using Hide and Show , display only the values for which you want to create a group.
  5. Click Validate .
    A grouping node is created for each value.

Manage Presets

You can save the current configuration of the spreadsheet or apply an existing one.

  1. In the spreadsheet, click Presets Manager .
  2. To save the current configuration of the spreadsheet:
    1. Optional: In the box, enter a name for the preset.
    2. Click Create Preset .
    A preset containing the current attributes, filters, and groups of the spreadsheet is created.
    Tip: You can share the preset using the file automatically downloaded in the CAT settings.
  3. To apply a preset to the spreadsheet, click Load Preset .

    You can revert to the default configuration by clicking .

  4. To update a preset with the current configuration of the spreadsheet, click Save Preset .

Export Content

You can export the spreadsheet content as a text, CSV, or TSV file.

  1. Select the spreadsheet content.

    Note: If only one line is selected, it will be the only line exported. To export the entire spreadsheet content, select all the lines.

  2. Click Export Content .
  3. Specify the folder in which to export the file, name the file, and choose a file type from the list.
  4. Click Save.
    A file containing the selected spreadsheet content is created in the specified folder.