Creating Automatic Fillets | ||||
|
| |||
-
From the
Refine section of the
action bar,
click
Auto Fillet
 .
.
The Automatic Fillet.x dialog box appears.
Tip: Optionally, click More to expand the dialog box and display images helping you define your specifications. -
In the Selection type box, select one of the following
computation modes.
- Current solid: the whole current solid is filleted. This is the default mode.
- Faces selection: the edges around the faces selected are filleted.
Help images reflect the computation mode you select.
-
In the Functional faces box, select the faces you do not
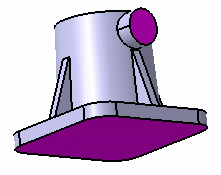
want to fillet. . The selected faces turn purple, indicating that they will not
be filleted.

-
In the Fillet radius and Round
radius boxes, enter a radius value for all edges requiring
filleting or rounding (convex or otherwise).
Filleting applies to sharp edges that are not convex. This operation adds material to the 3D shape. Rounding applies to sharp edges that are convex. This operation removes material from the 3D shape.
-
Because of mechanical reasons, a distinction needs to be made
between filleting and rounding. The command lets you assign distinct radius
values to the different edge types.
By default, Round Radius is disabled. This means that if you modify the radius value, the round value is automatically modified and displays the same value as the radius value. Select this option to apply a radius value. If this option is disabled, its value is half the smallest value. For example, if the fillet radius value is 5 and the round corner value is 4, then the value used is 2.
-
Select Show curvature less than check box to ensure that
the app displays the fillets and rounds whose
radius value is less than the smaller radius value you entered.
-
Click
OK to confirm.
A new dialog box appears, indicating the operation progress.
- In case you want to interrupt the operation, click Cancel.
- If the app detects fillets or rounds whose radius value is less than radius value, a warning message is issued.
-
To show the fillets and rounds, select the warning message from
the
Warningswindow.
The fillets and rounds are displayed in red in the work area:

-
Click Close to close the Warnings
box.
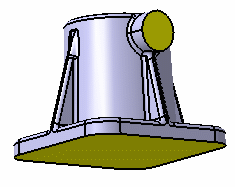
The operation is complete. All the edges except for edges surrounding both functional surfaces are filleted. A new feature identified as AutoFillet.x is added to the tree. Compared to manual filleting, using AutoFillet reduces the number of features in the tree.
